Manufacturing
Boards
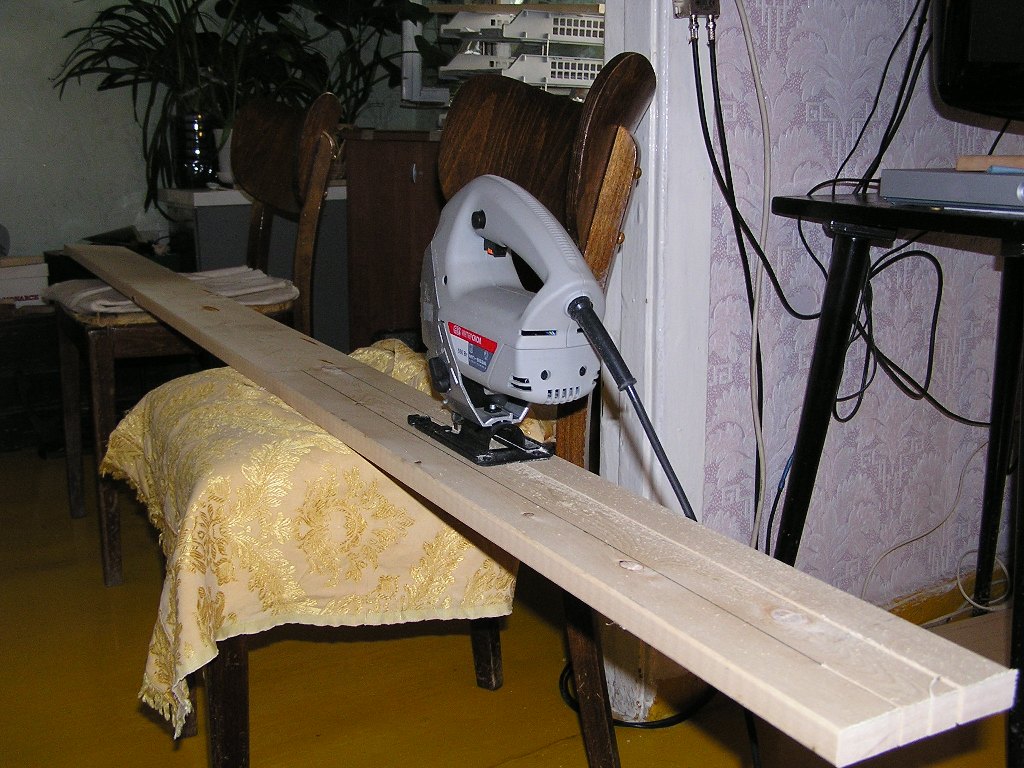
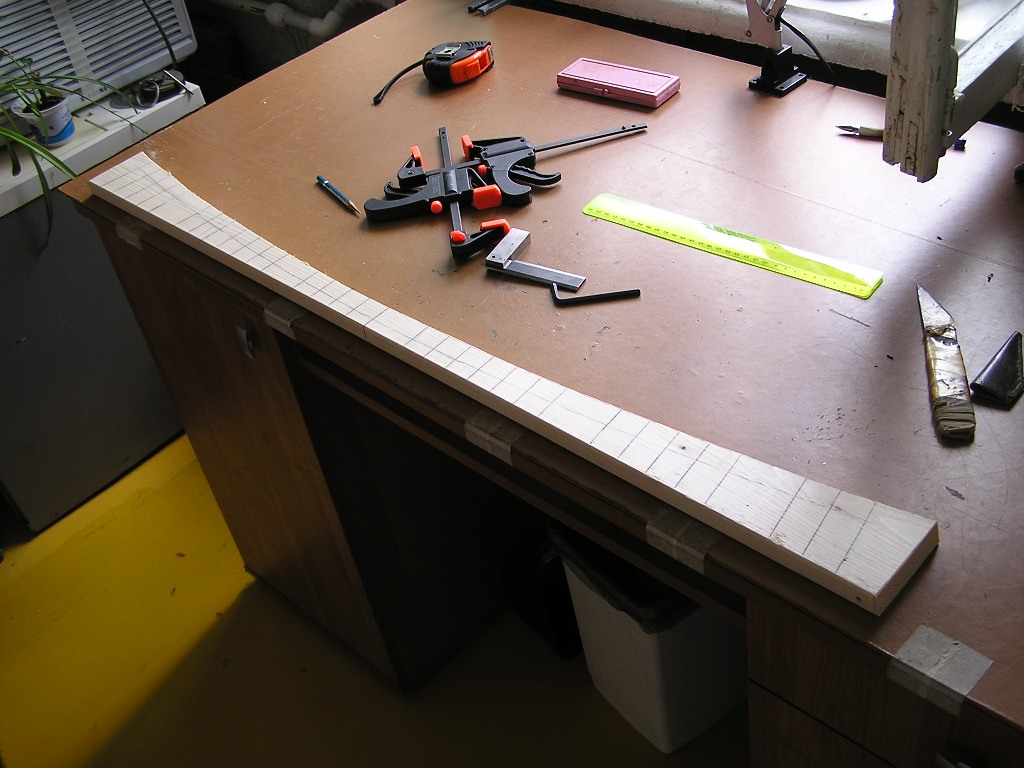
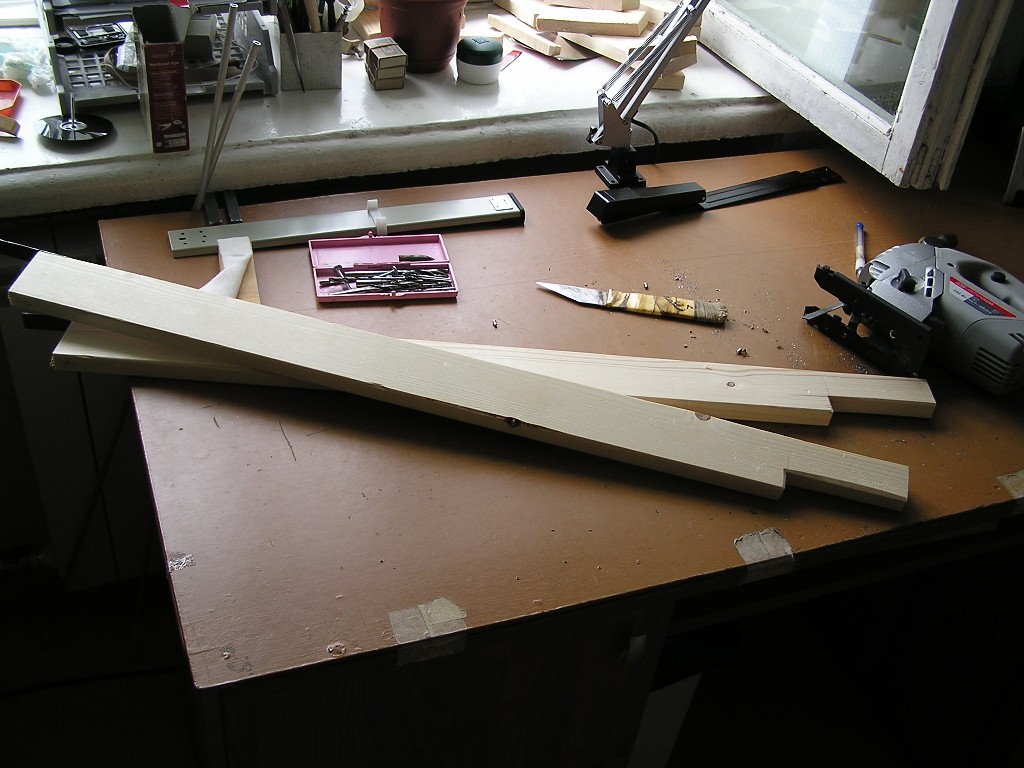
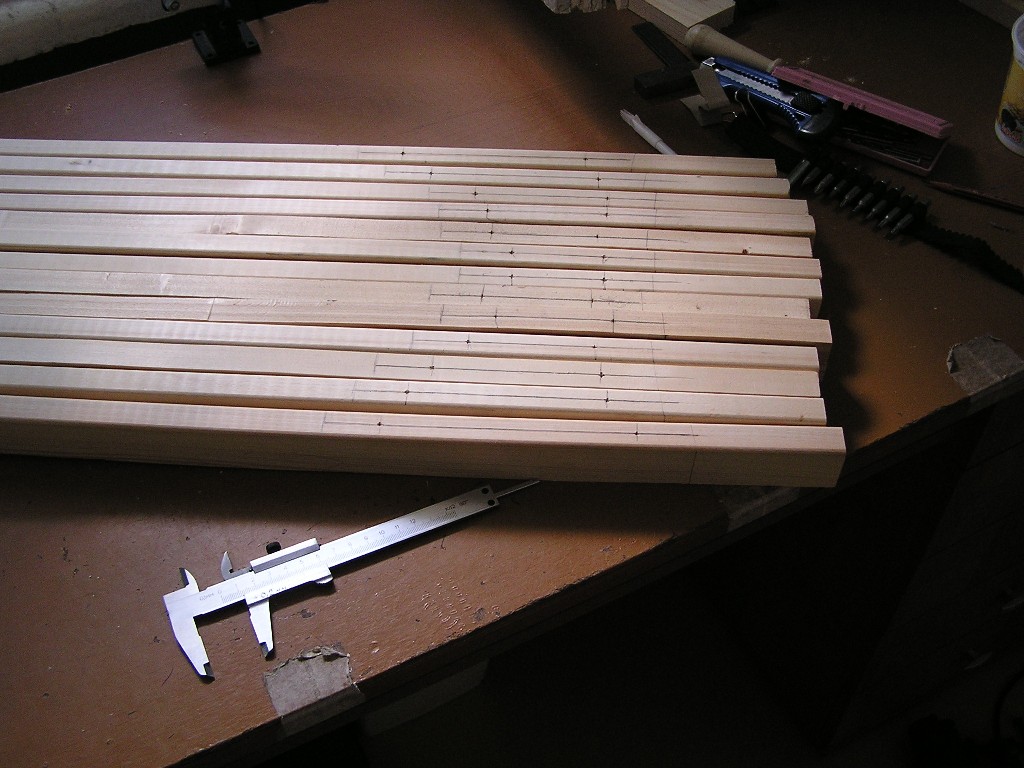
The whole pedalboard is made of pine. I made it from boards 20x123x3000mm
and 20x148x3000mm, fortunately, it was already planed. I used 148mm width boards
for the case and 123mm width boards for the keys.
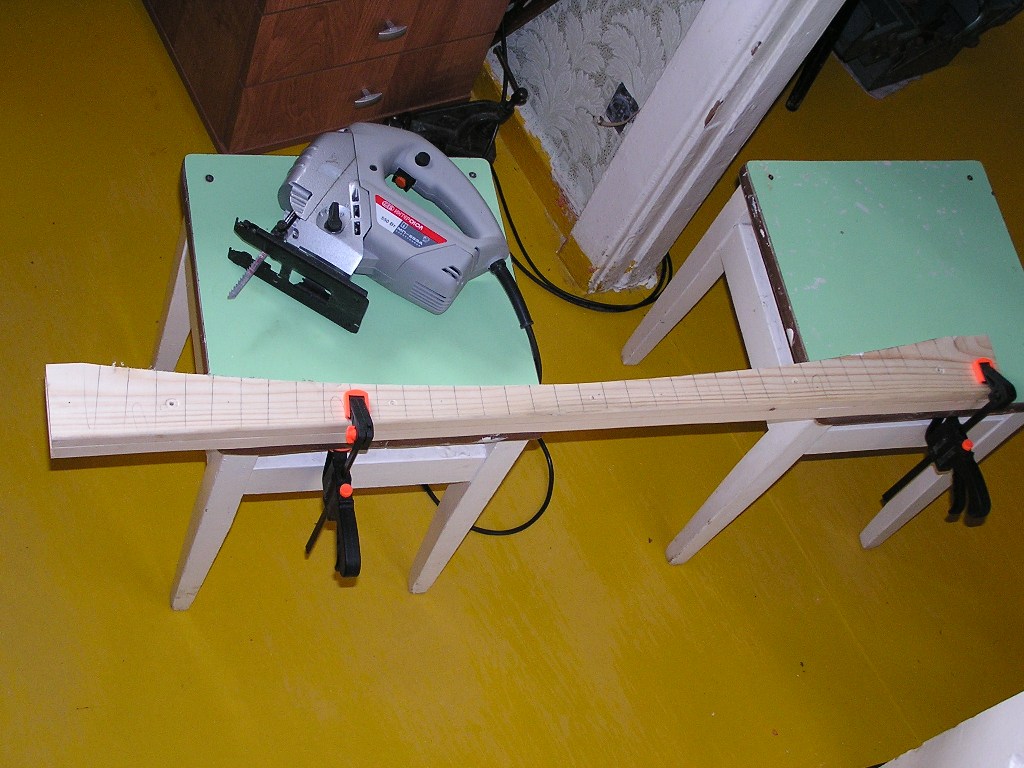
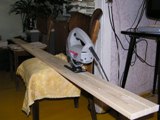 Take a fretsaw and begin to saw.
Case
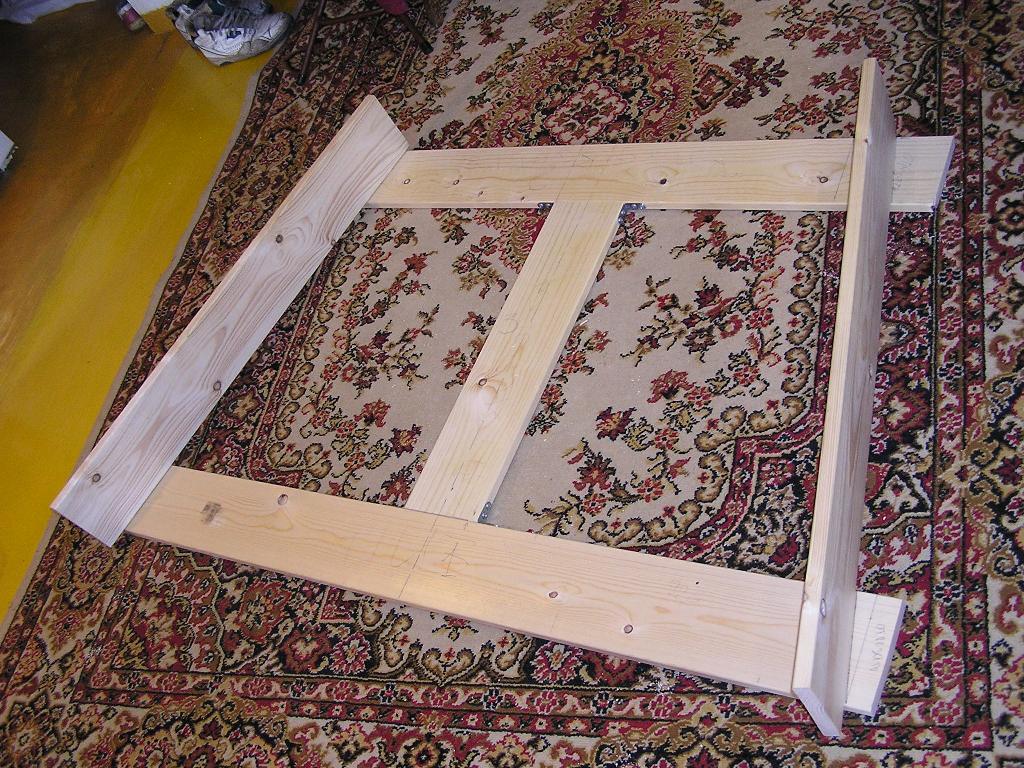
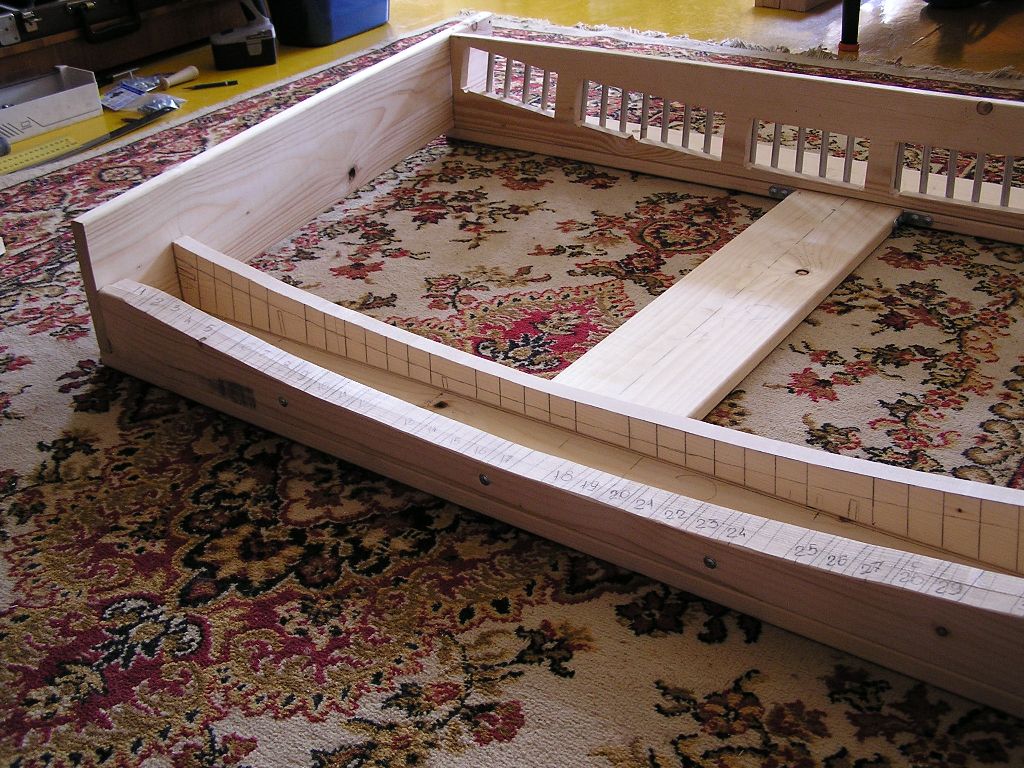
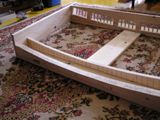
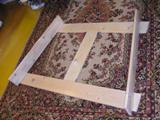 Now we made a case. Place a base on a floor and attach a center board by the
aluminium corners.
Now we made a case. Place a base on a floor and attach a center board by the
aluminium corners.
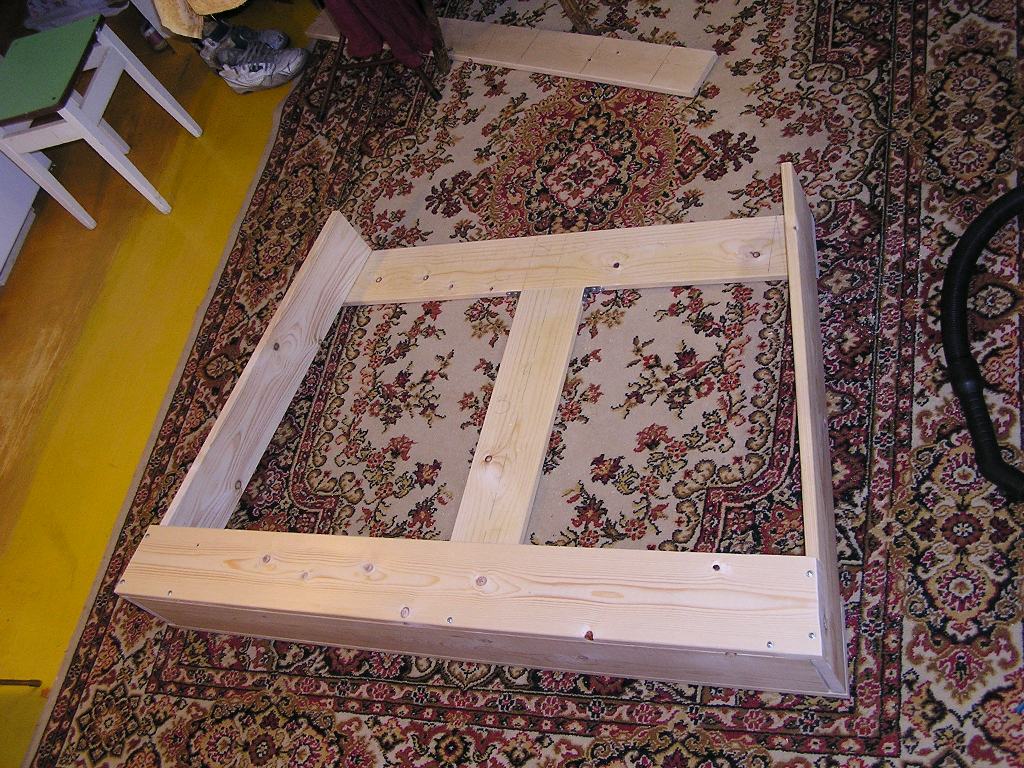
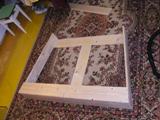 Attach the sides.
Place a top cover.
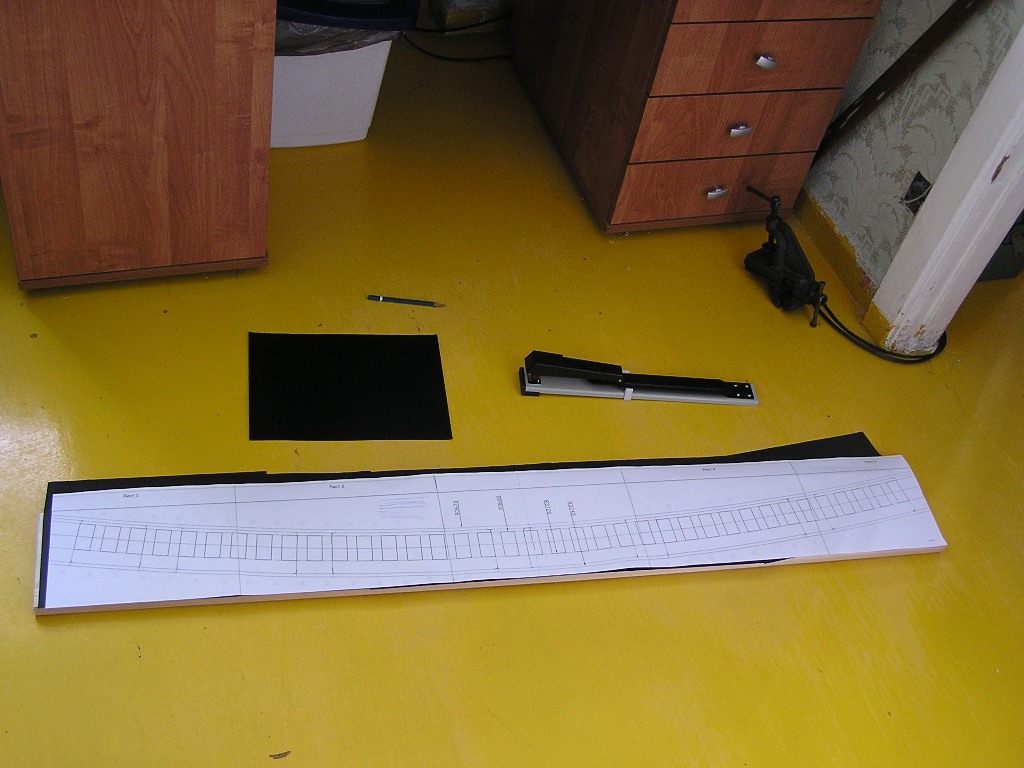
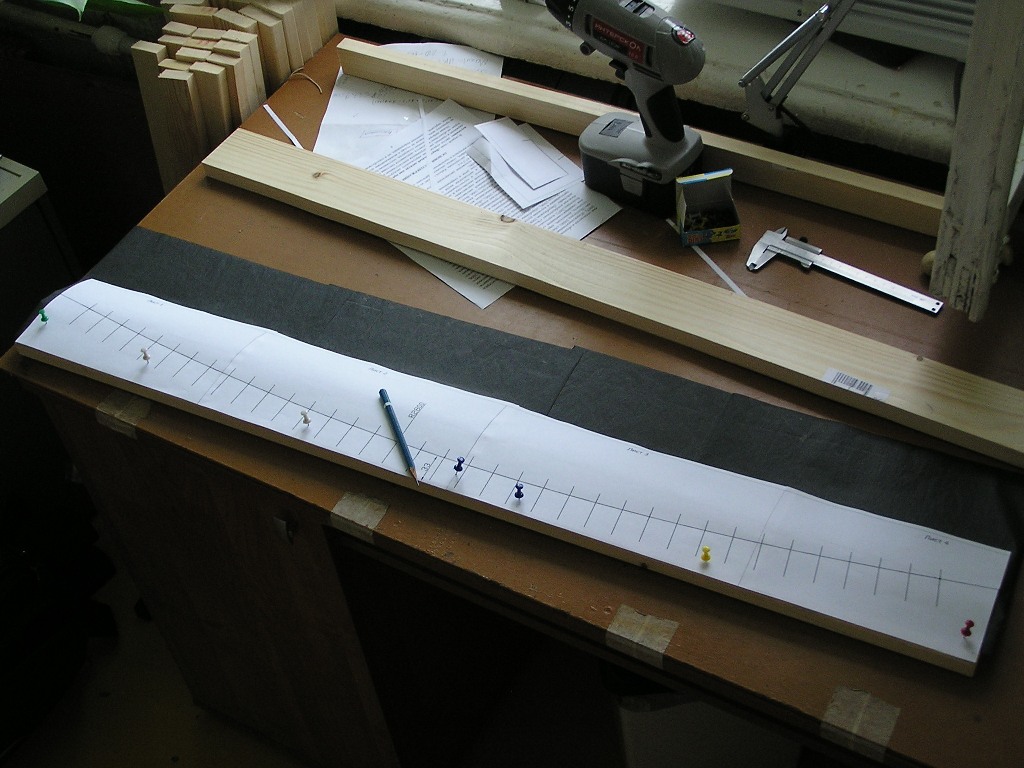
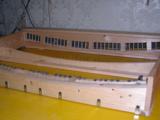
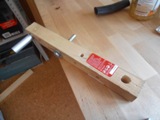
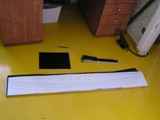 After that, we mark a front arc board. To do it, print a draw on the several
pages and copy it to the board by a carbon paper. Besides cuttings, we mark
positions for the holes to place guide tubes.
After that, we mark a front arc board. To do it, print a draw on the several
pages and copy it to the board by a carbon paper. Besides cuttings, we mark
positions for the holes to place guide tubes.
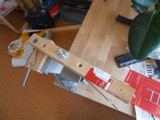
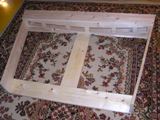 After that we made two holes at the opposite corners of every future cuttings
to place a fretsaw. ...So, saw. Here is a result.
After that we made two holes at the opposite corners of every future cuttings
to place a fretsaw. ...So, saw. Here is a result.
 Our cat. Tailless.
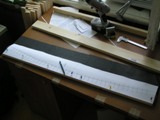
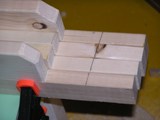
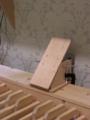
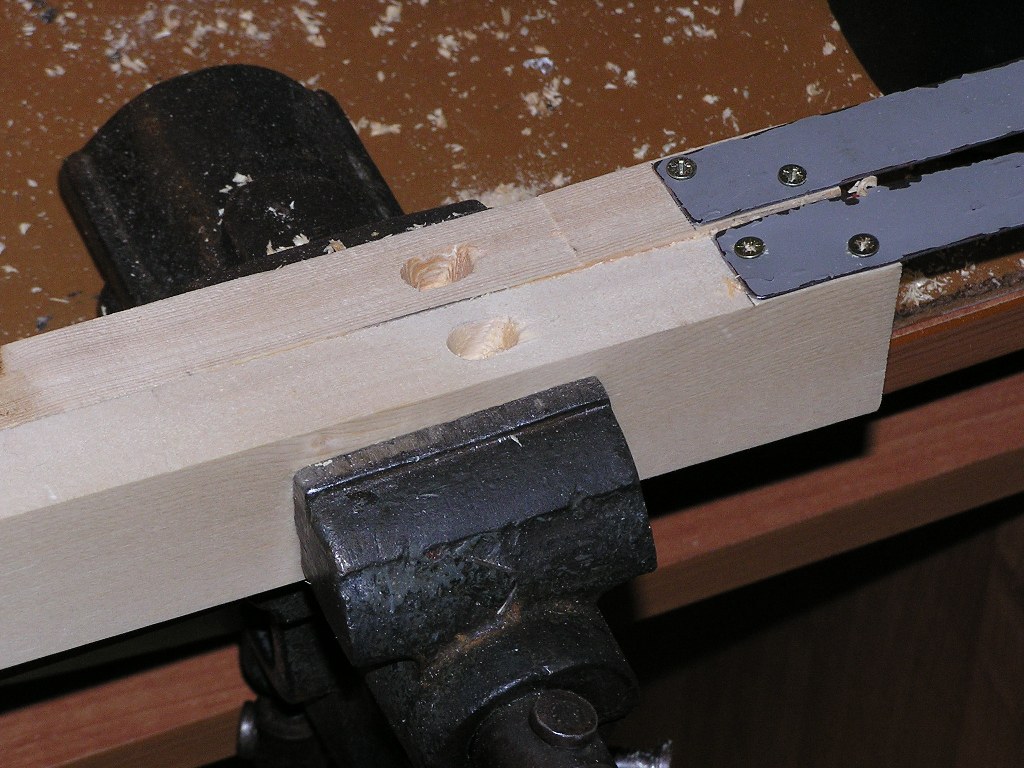
 Now, let's made a rear arc board. To do it, we attach two boards via screws
and saw it through a once more template
Now, let's made a rear arc board. To do it, we attach two boards via screws
and saw it through a once more template
DON'T THROW OUT THE REST PART!!! It will be usefull.
Keys-I
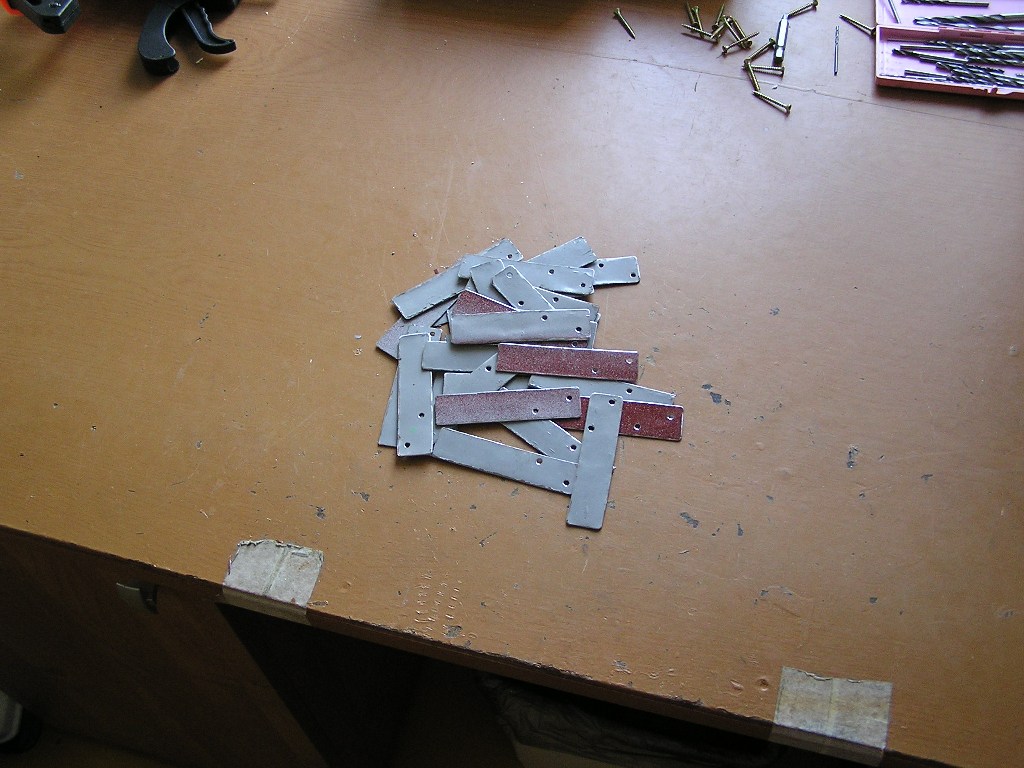
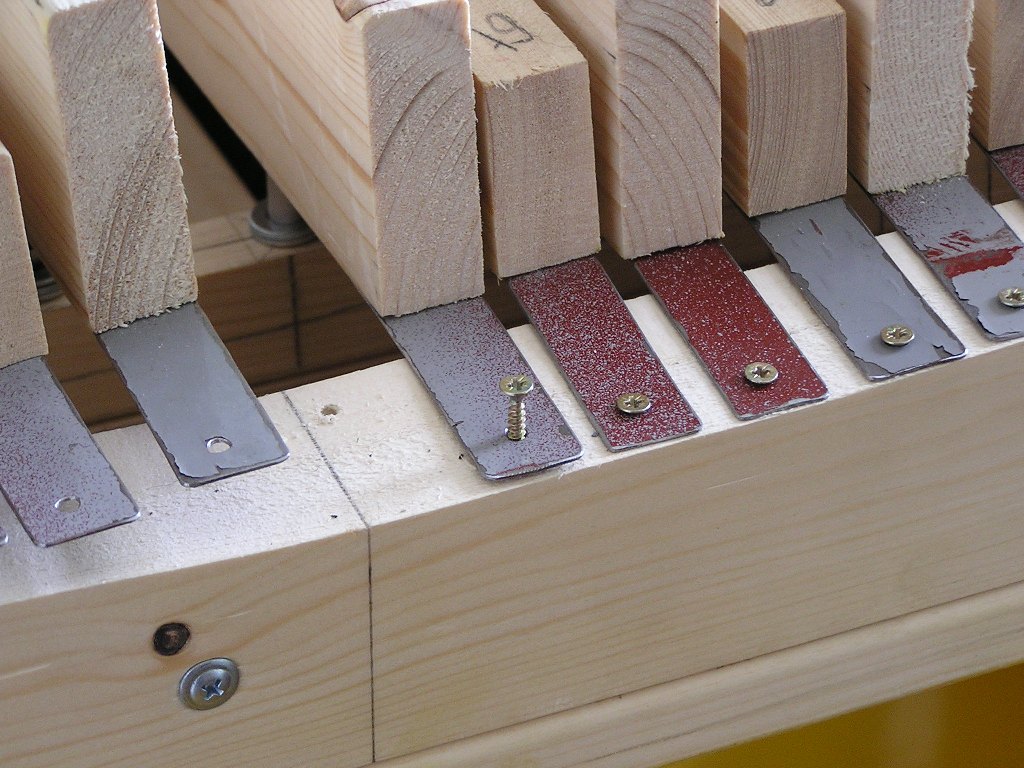
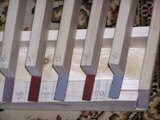
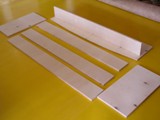
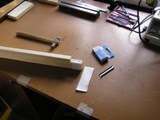
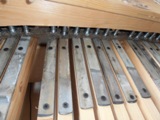
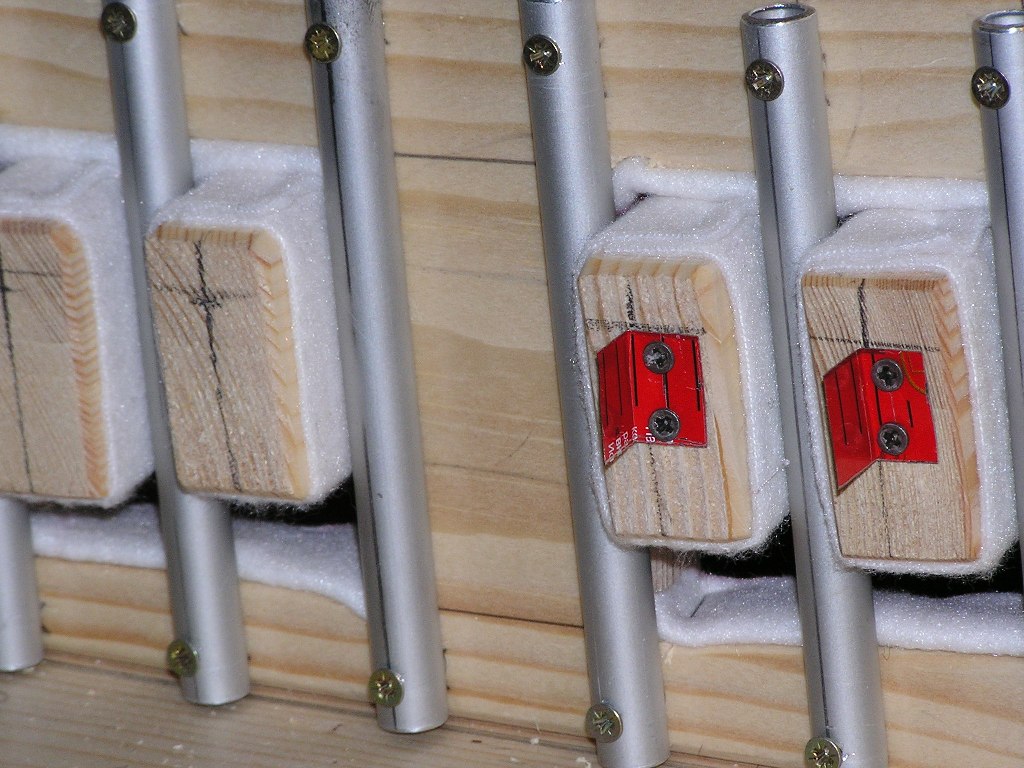
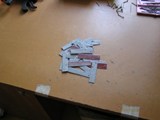 After that, let's made key's fasteners. There are different ways to attach keys.
I used metal plates. Shortly before beginning of pedal construction, we bought
a new washing machine, and I had a parts of old one – such nice metal
sides. I had cut it and made a two holes for screws 3mm.
After that, let's made key's fasteners. There are different ways to attach keys.
I used metal plates. Shortly before beginning of pedal construction, we bought
a new washing machine, and I had a parts of old one – such nice metal
sides. I had cut it and made a two holes for screws 3mm.
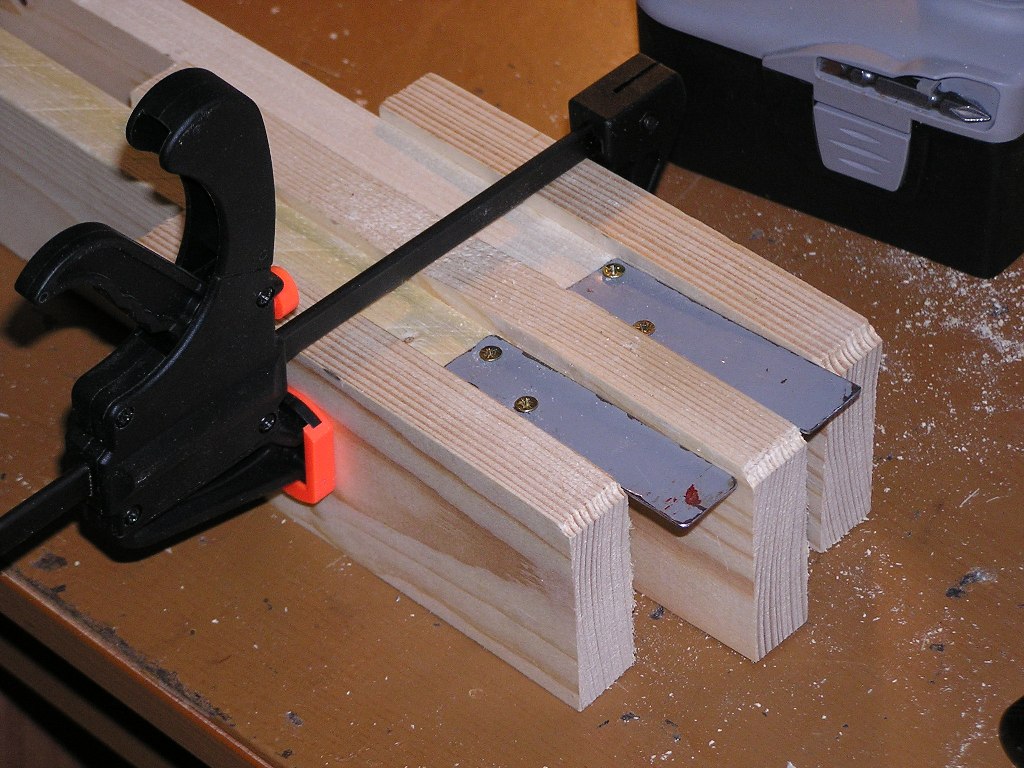
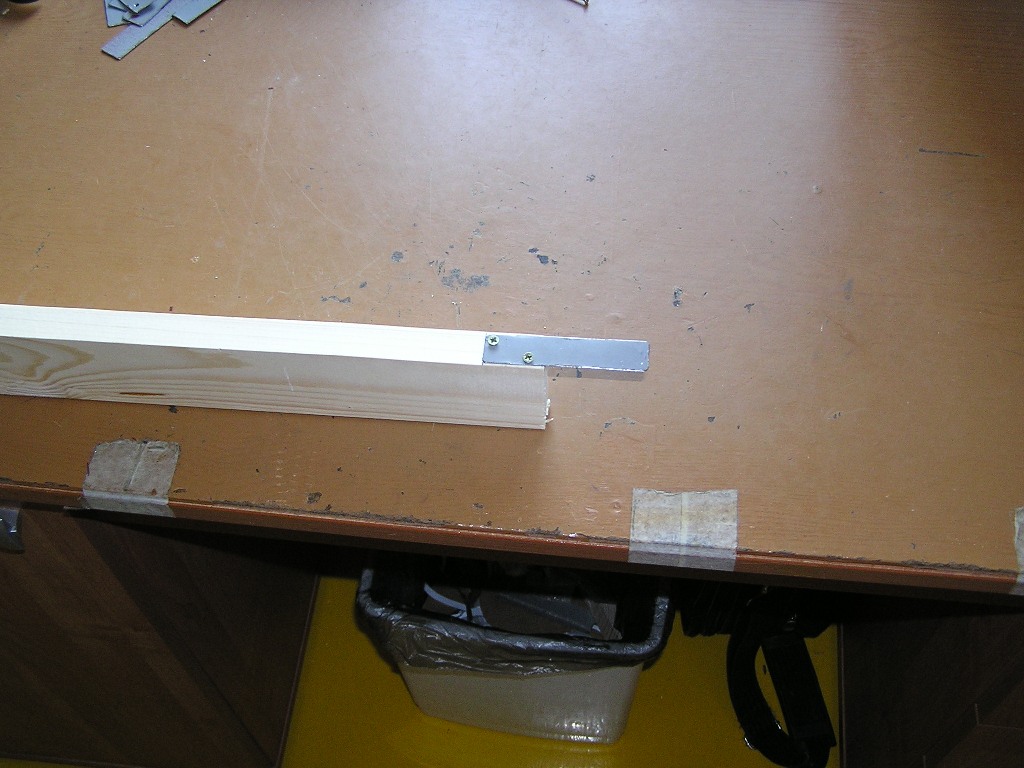
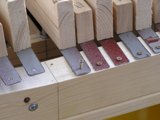
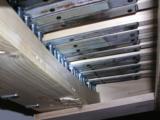
 Now, we attach these plates to keys. To do it faster, I made a conductor.
 Here is it looks in a case;
There is a question – where are the sharp's top pieces? Nowhere, for
a while. We will install it later, because it is easier to maniplate with the
keys without top pieces.
Tracks
To force the keys move straight up-down, we need a tracks. Two modes of it's
placement exist: at the center of the keys or around it. I have choosen the
second one, because it is dangerous to make a section in a 20mm board.
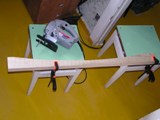
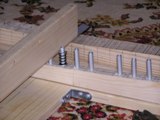
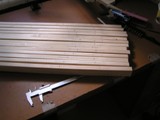
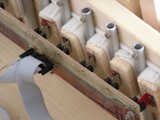
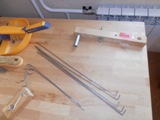
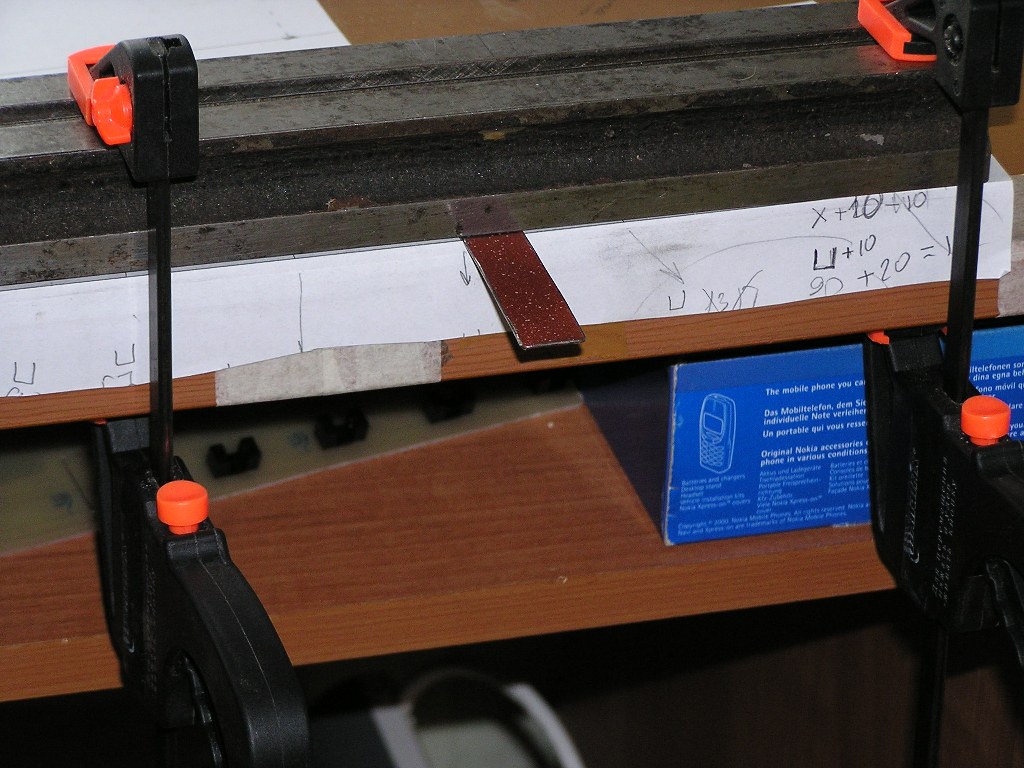
 So, take a 10mm aluminium tube and cut it on 40 pieces by 110mm. In every one
we made two holes at 7.5mm from tube sides. After that, we attach tubes to
the front arc board in previously marked points.
So, take a 10mm aluminium tube and cut it on 40 pieces by 110mm. In every one
we made two holes at 7.5mm from tube sides. After that, we attach tubes to
the front arc board in previously marked points.
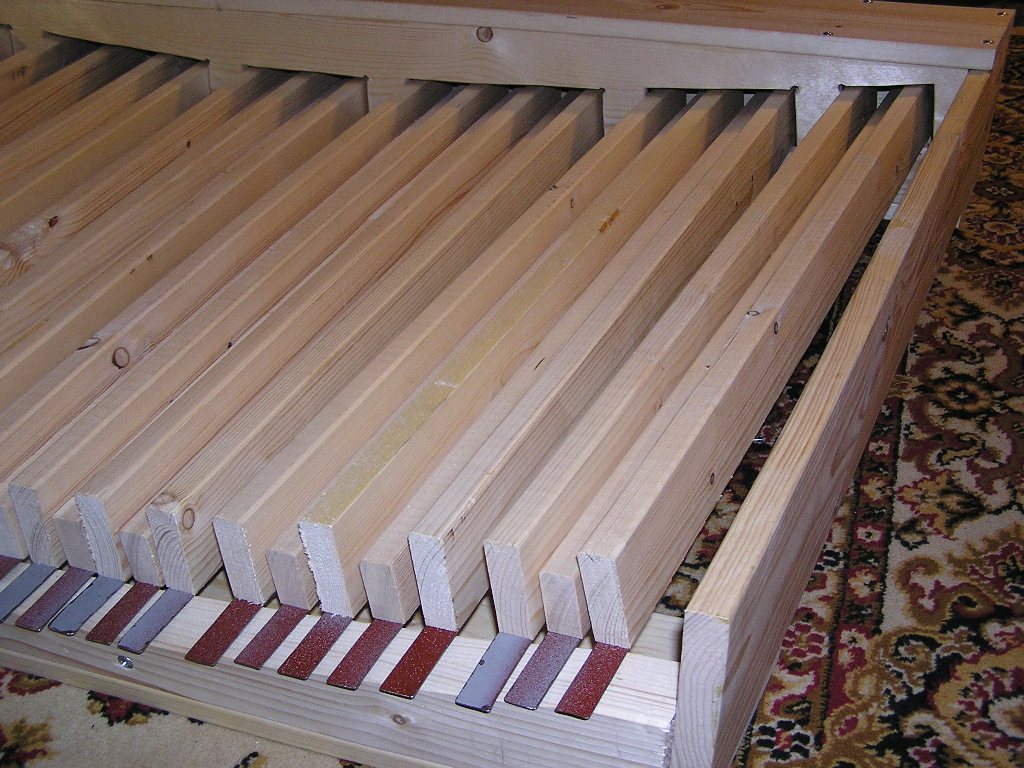
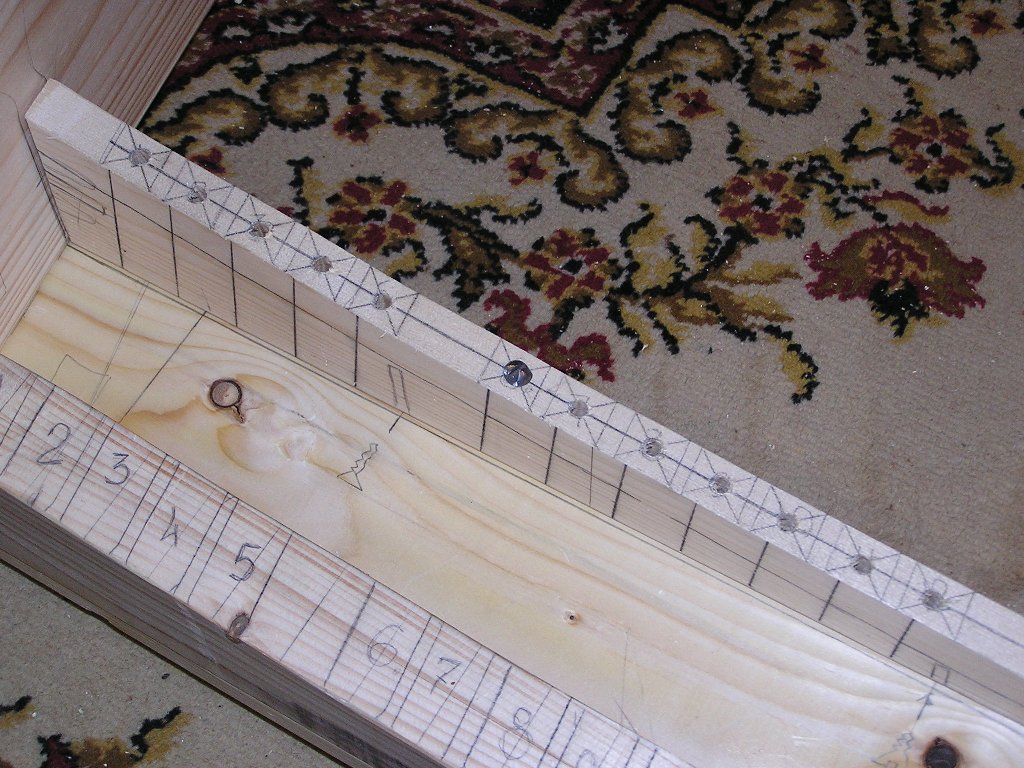
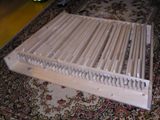
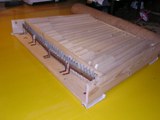
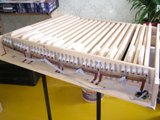
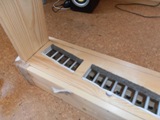
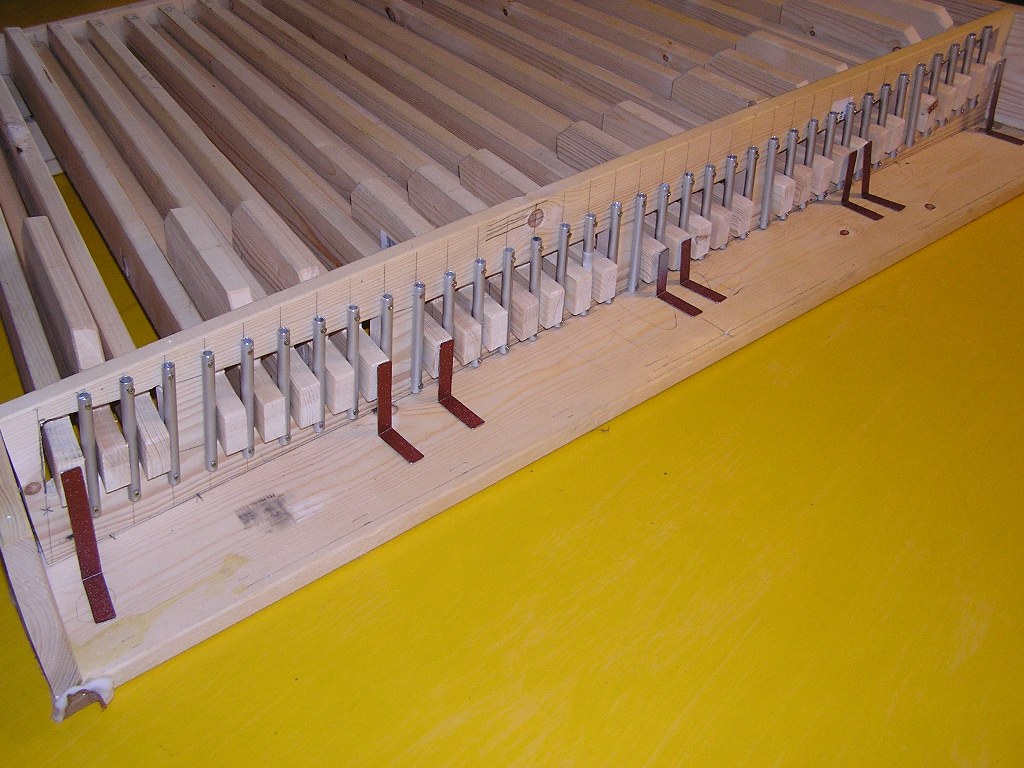
 Now, we install a front board with the tracks to the case and put the keys.
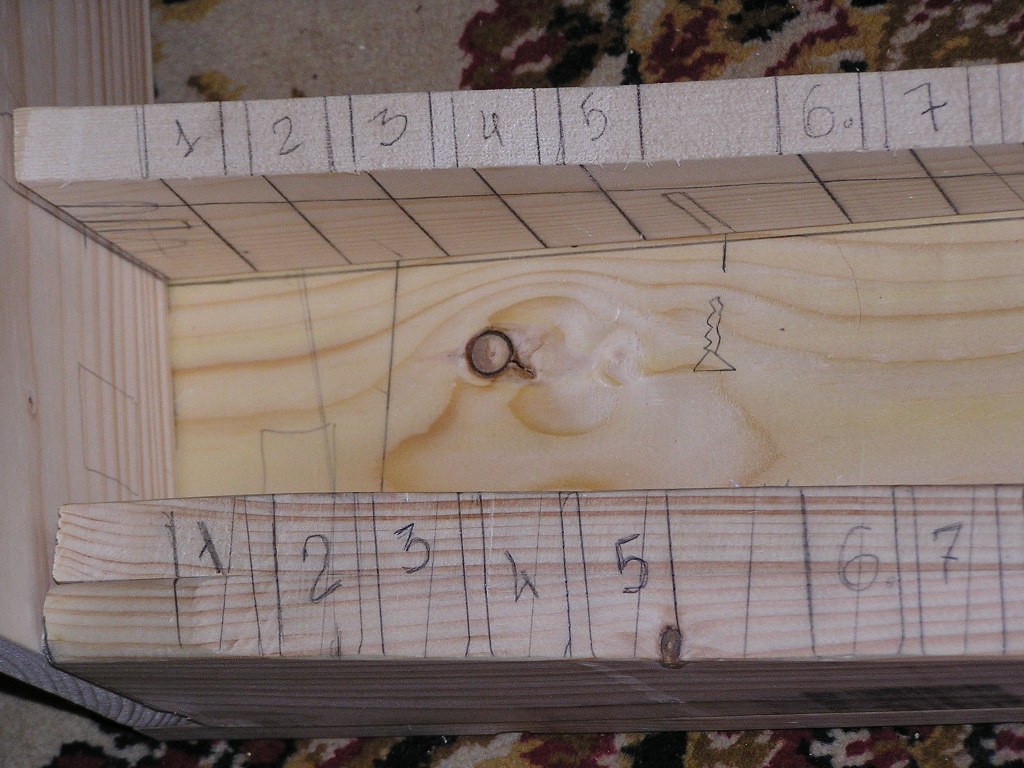
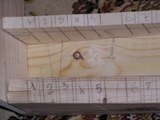
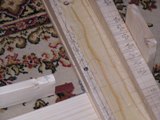
Let's made a key markings. We need to mark three lines: keys cuttint, white
key sections and sharp pieces places. The first two lines we made by a
guideline, the third – by means of pencil and tape measure.
Now, we install a front board with the tracks to the case and put the keys.
Let's made a key markings. We need to mark three lines: keys cuttint, white
key sections and sharp pieces places. The first two lines we made by a
guideline, the third – by means of pencil and tape measure.
Springs
And now – the most complex thing – springs block. I hadn't
classical V-shape springs, but I had a spiral ones, and very strond at that.
So, I decided to make once more arc board under the keys, on which the springs
will be installed.
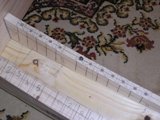
 As before, we mark and cut an arc board. Note, than now an arc radius is 20mm
less then we need. It allows us to put keys on this board and make a marks. I
made this board from the pine, but it is better to use a plywood (18mm
thickness or two by 10mm, connected by screws).
As before, we mark and cut an arc board. Note, than now an arc radius is 20mm
less then we need. It allows us to put keys on this board and make a marks. I
made this board from the pine, but it is better to use a plywood (18mm
thickness or two by 10mm, connected by screws).
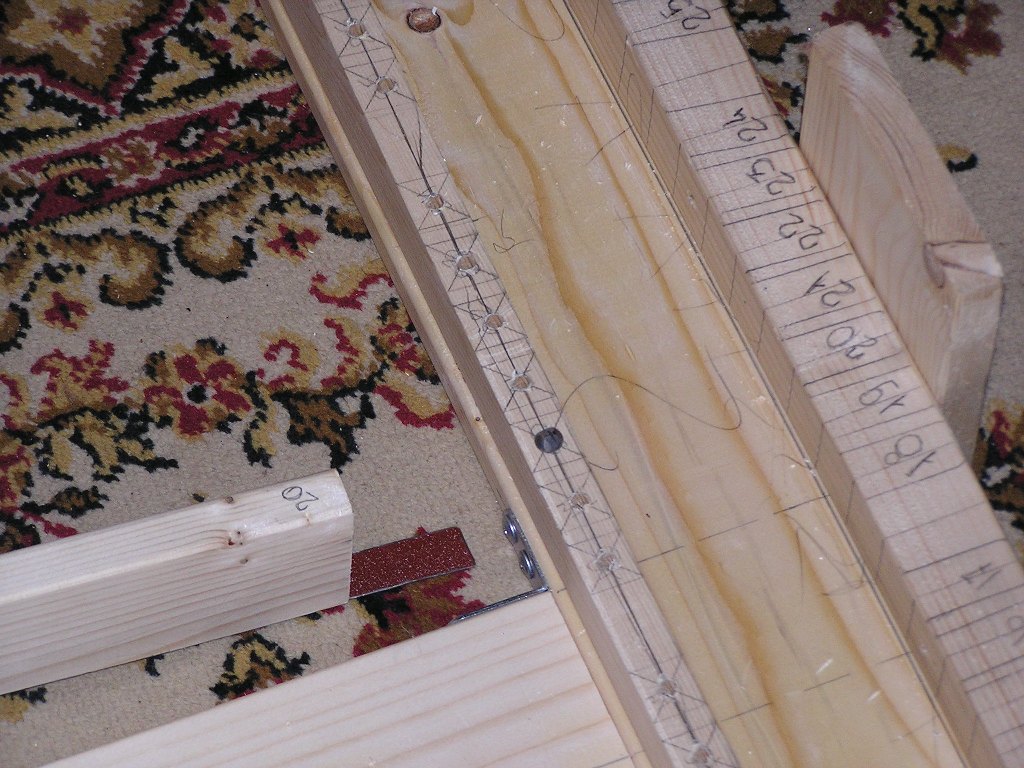
 Attach an arc to the case and put the even keys. Mark it's positions.
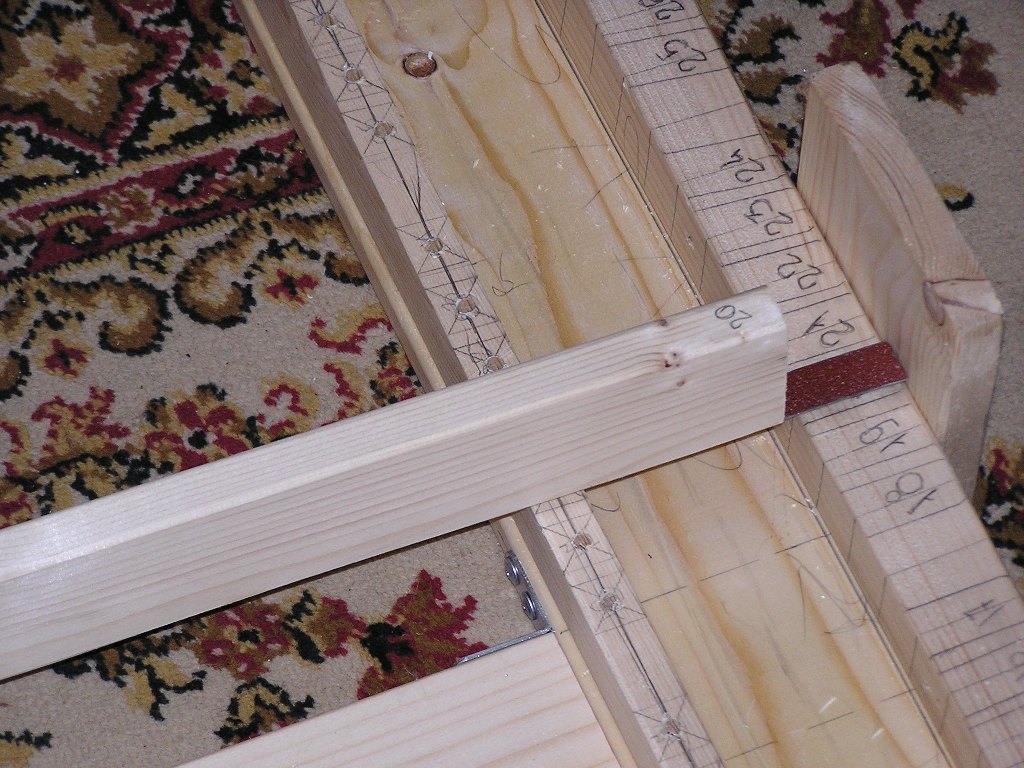
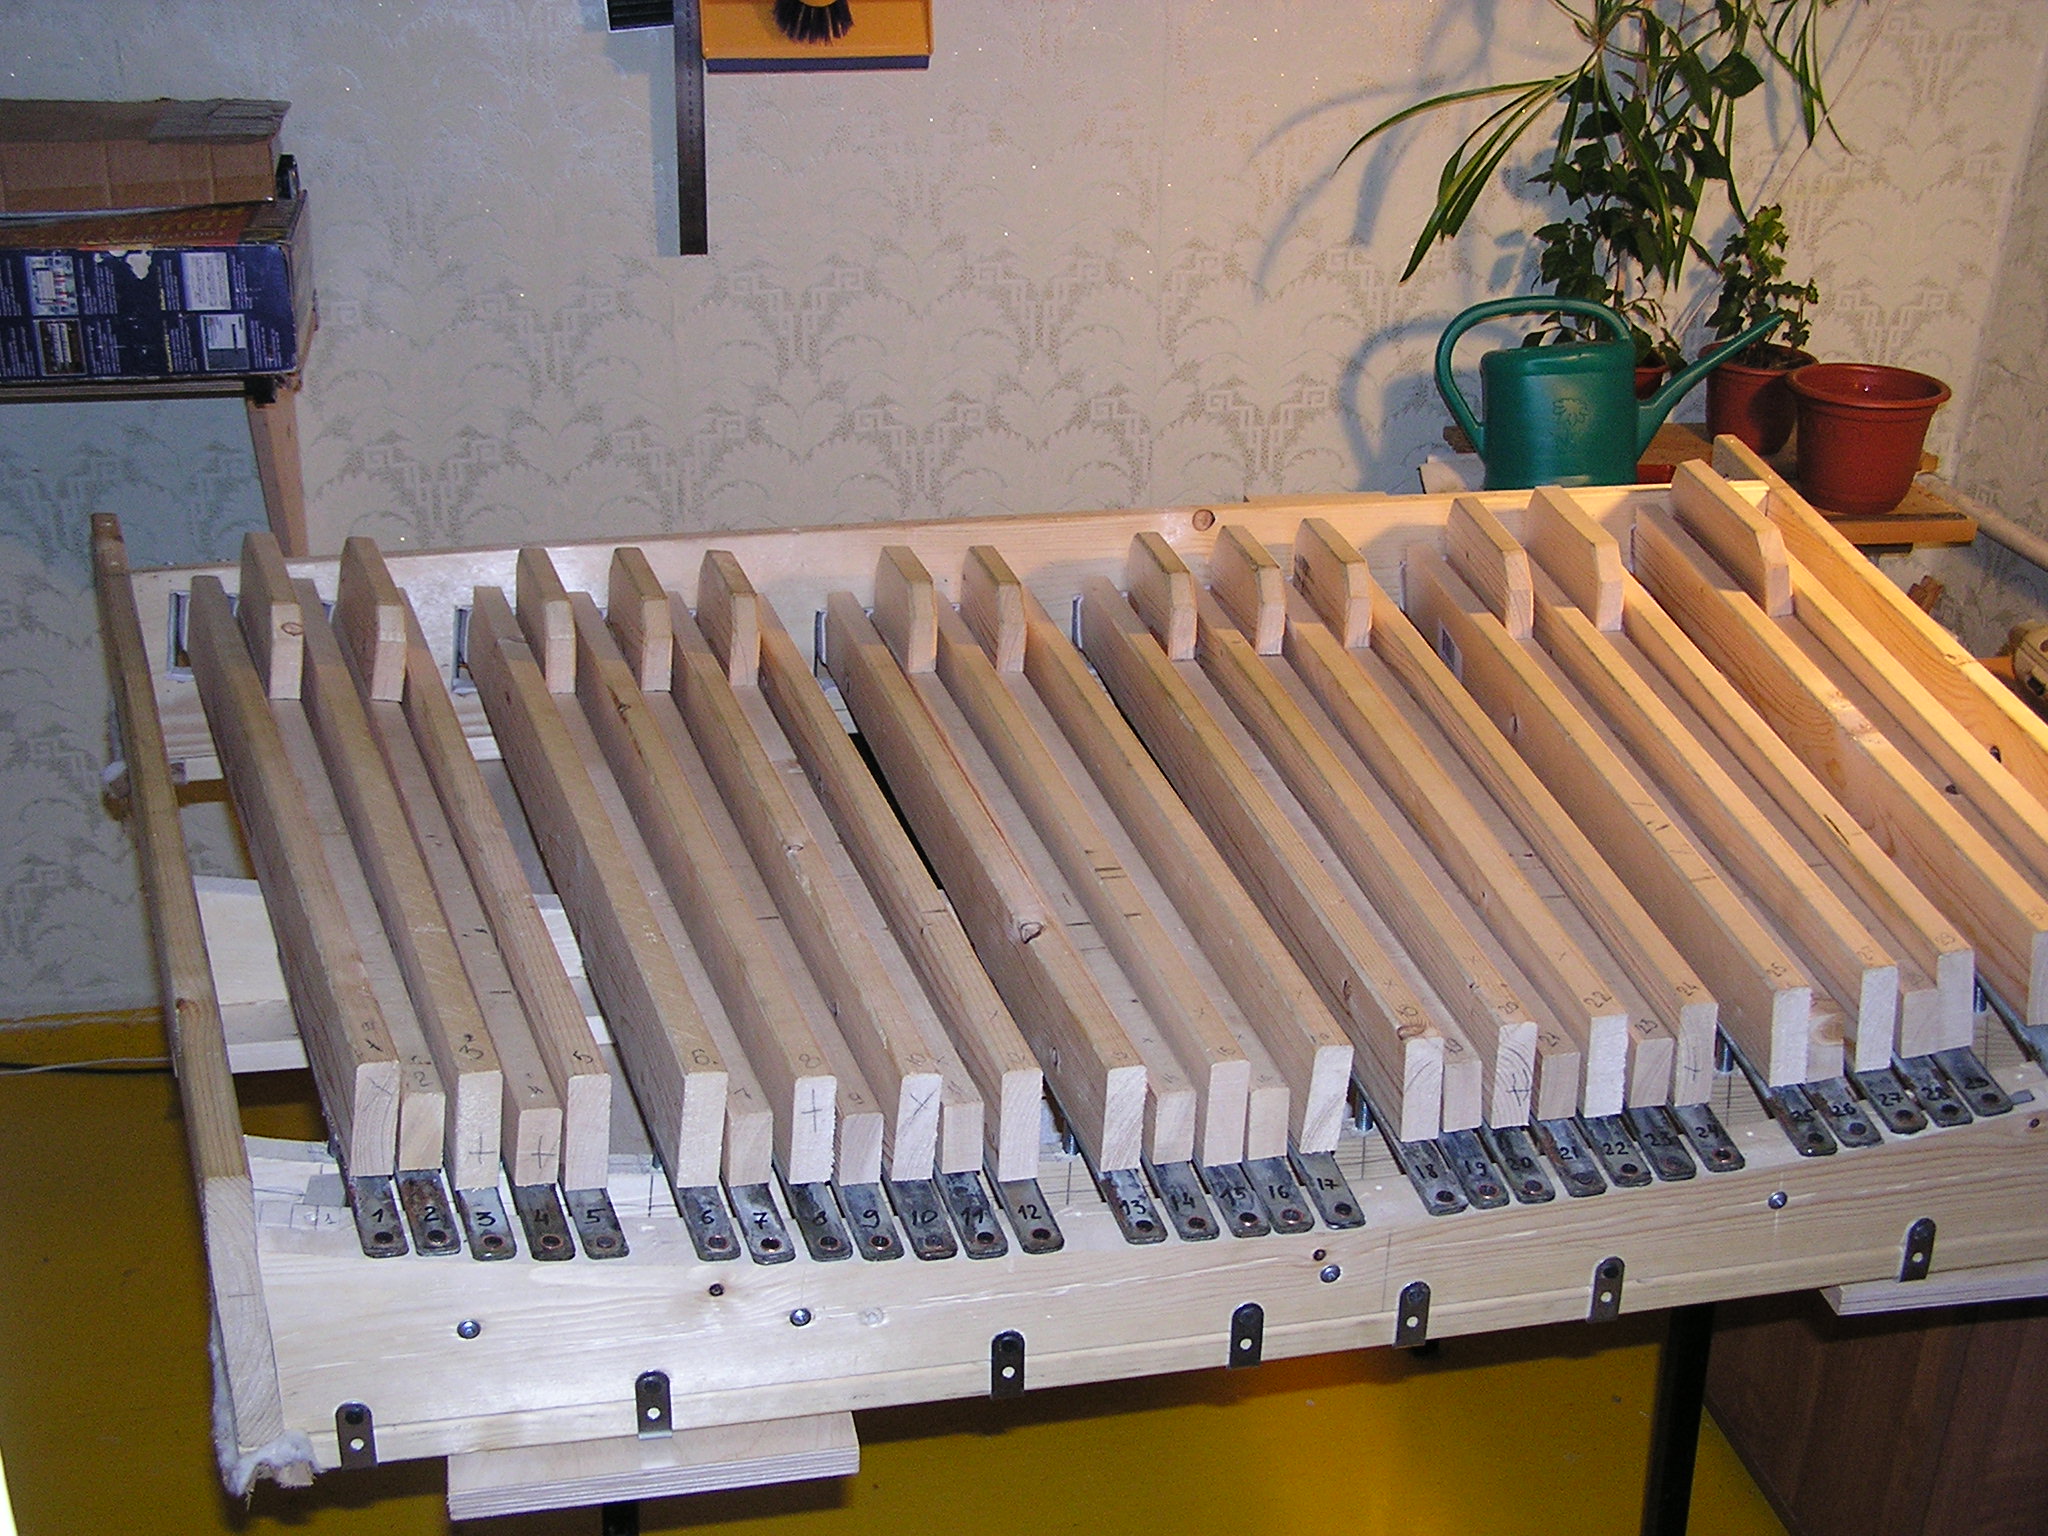
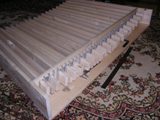
 Now, we put the rest keys and mark it's position. Here is a result.
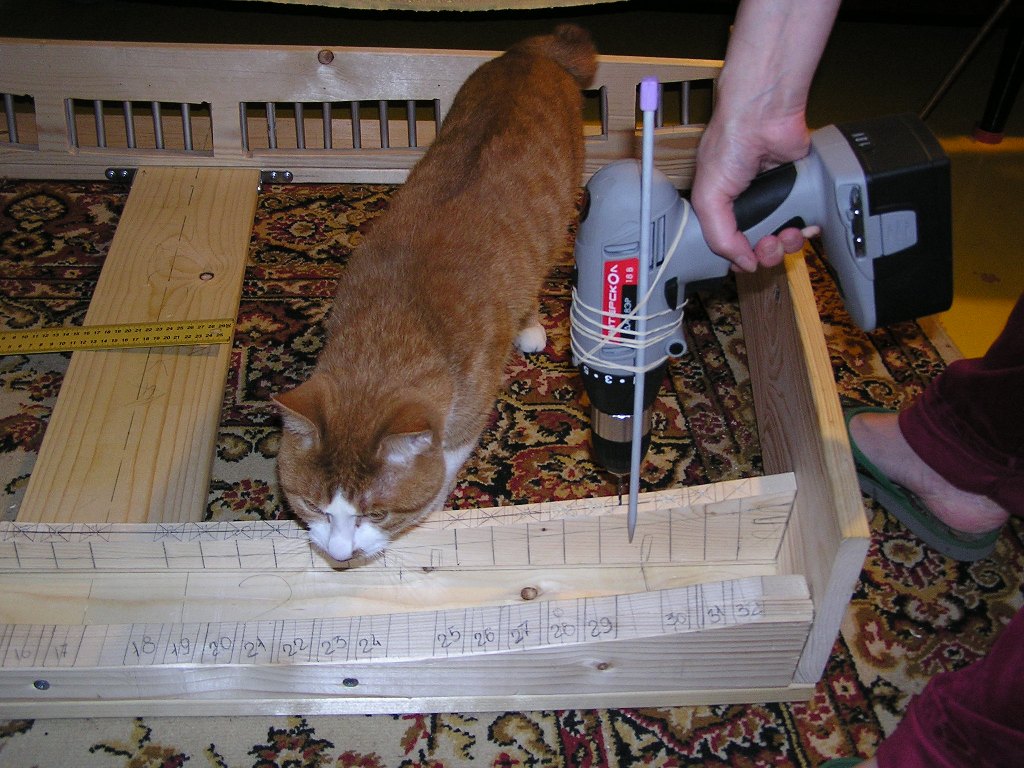
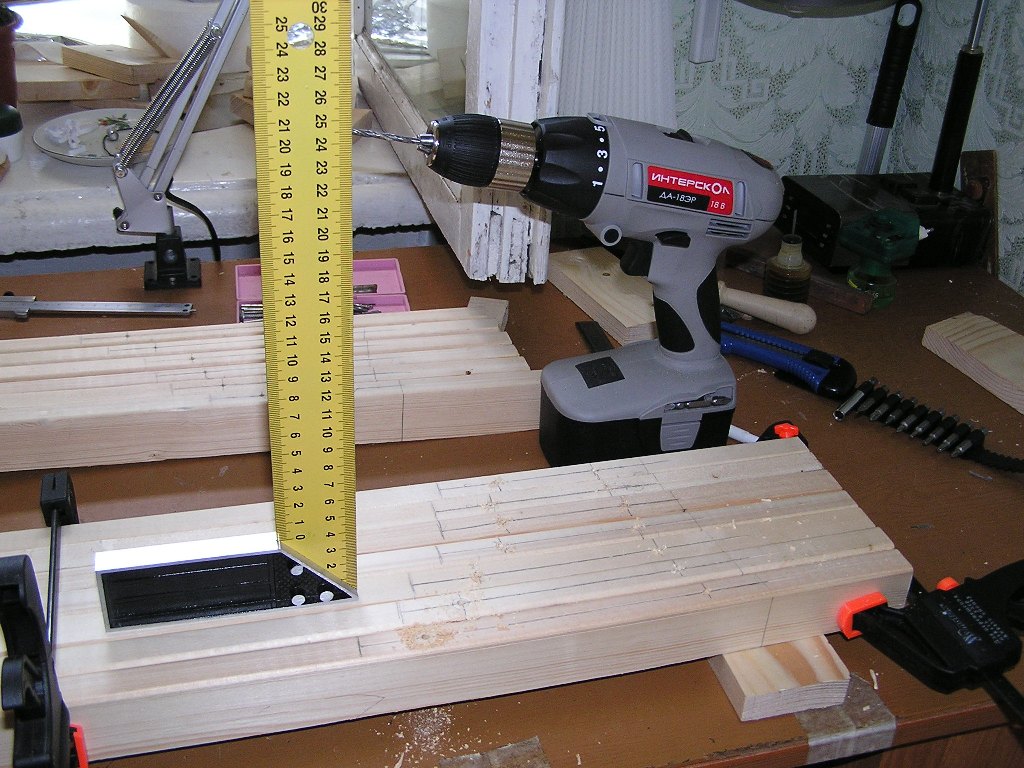
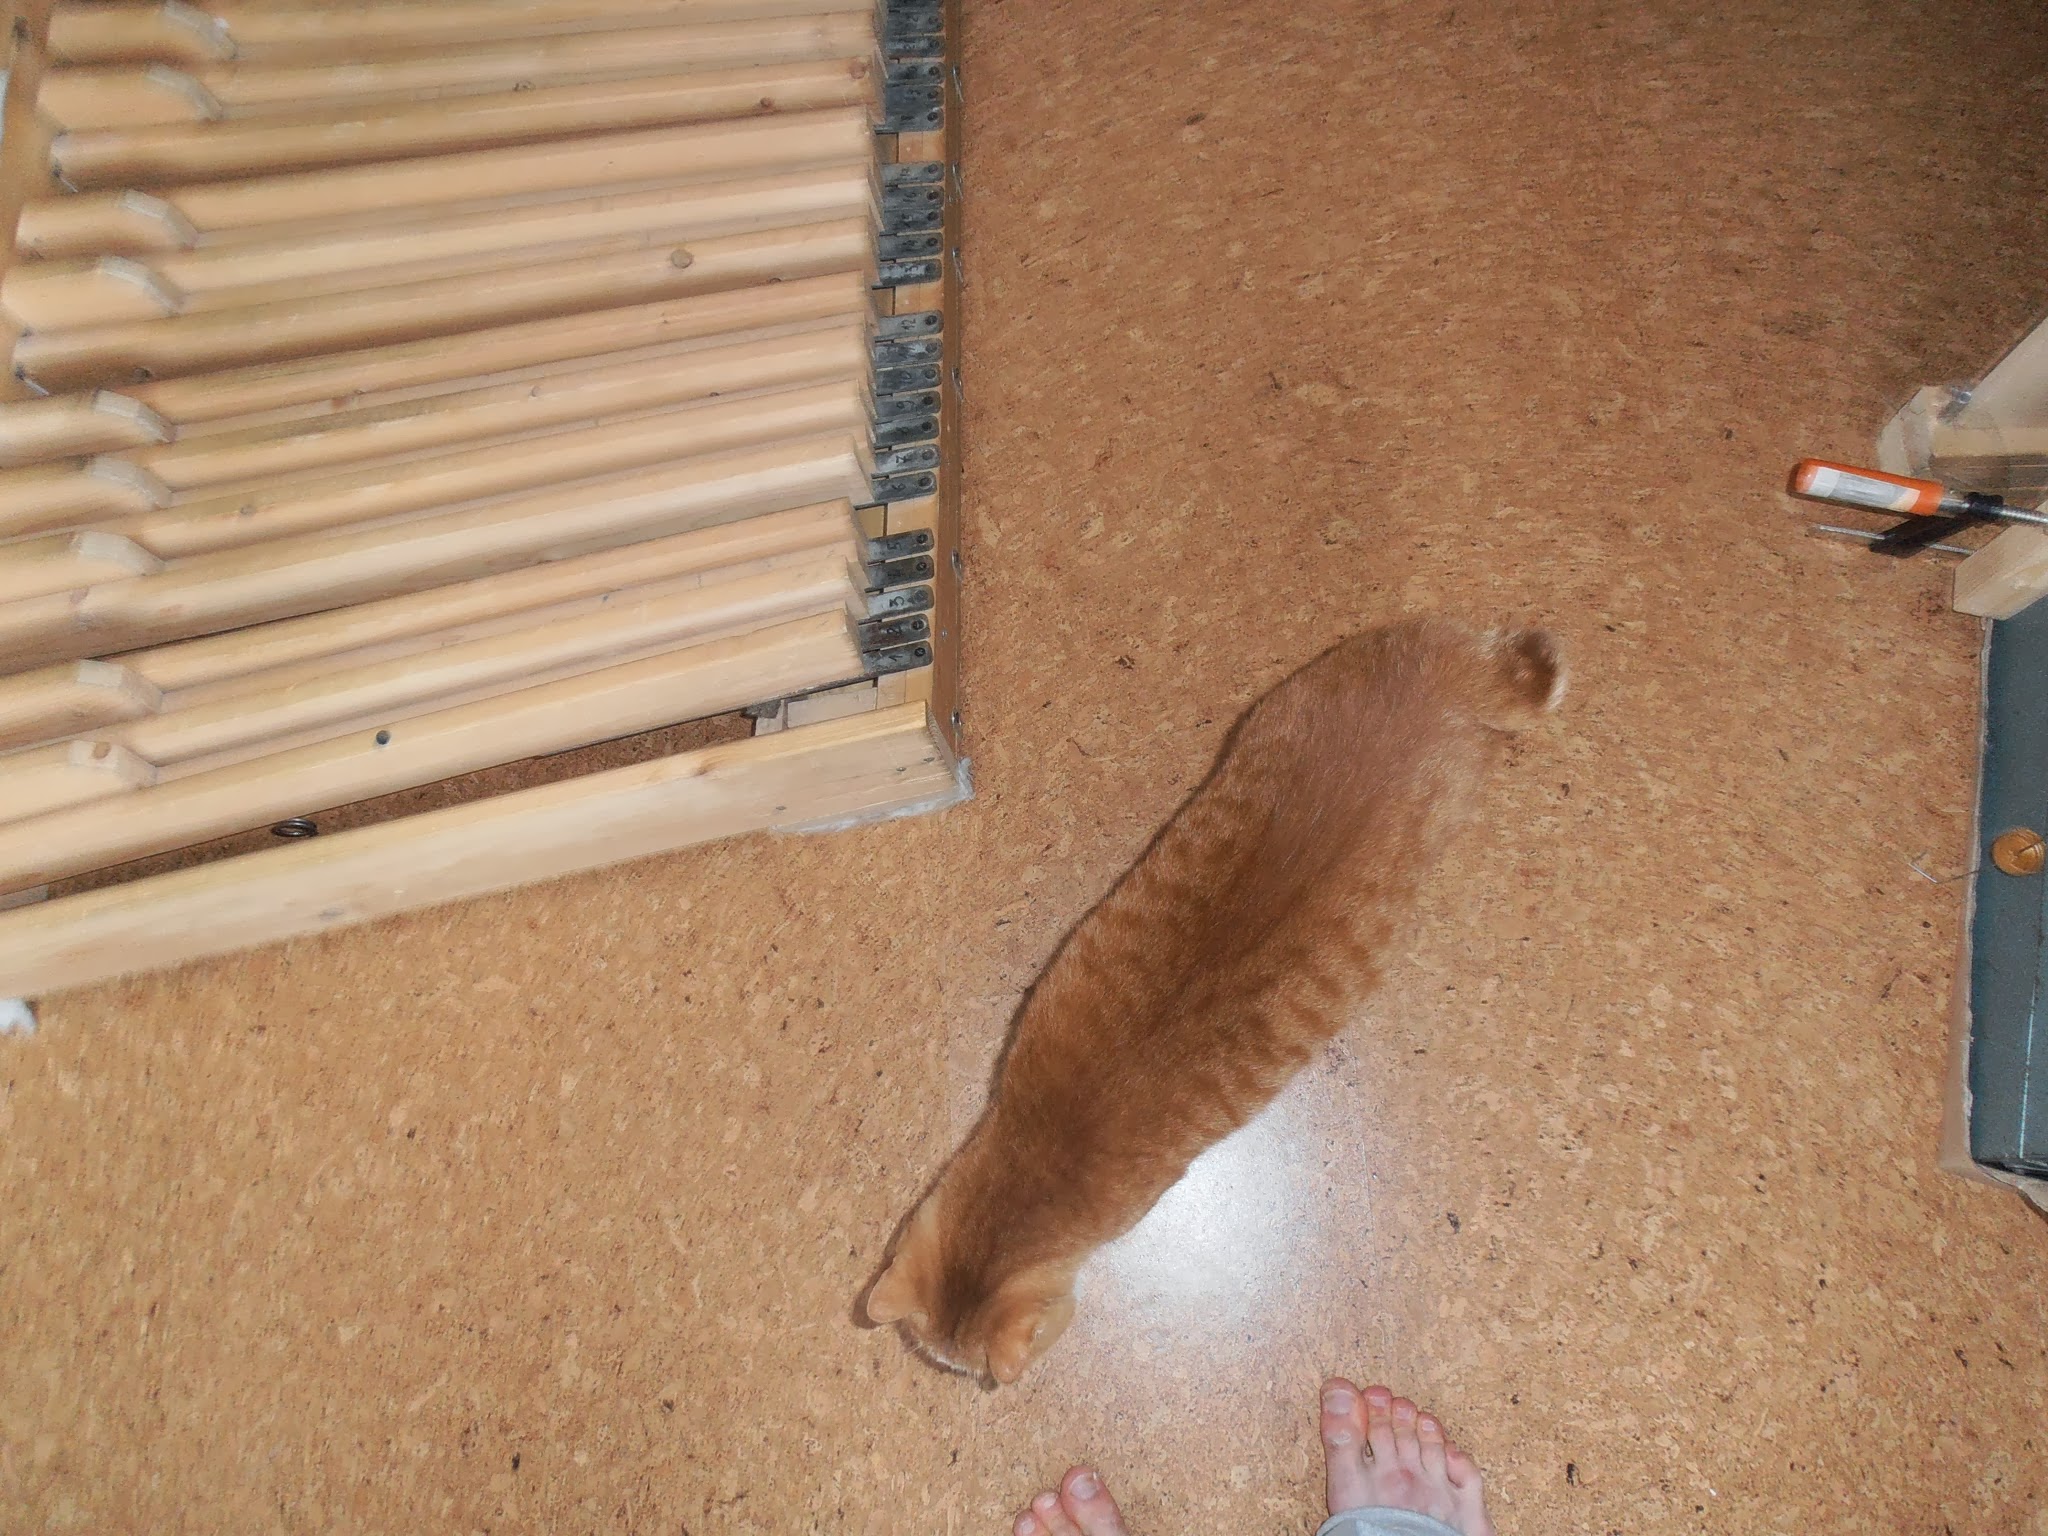
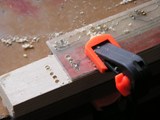
 After that, we drill holes for tubes. To track a drill along the lines marked,
I attached a knittng needle to the drill. ...The cat again.
After that, we drill holes for tubes. To track a drill along the lines marked,
I attached a knittng needle to the drill. ...The cat again.
 We made the holes in then board, let's make holes in the keys. It is
unposiible to calculate it's positions beforehand, so we need to mark it.
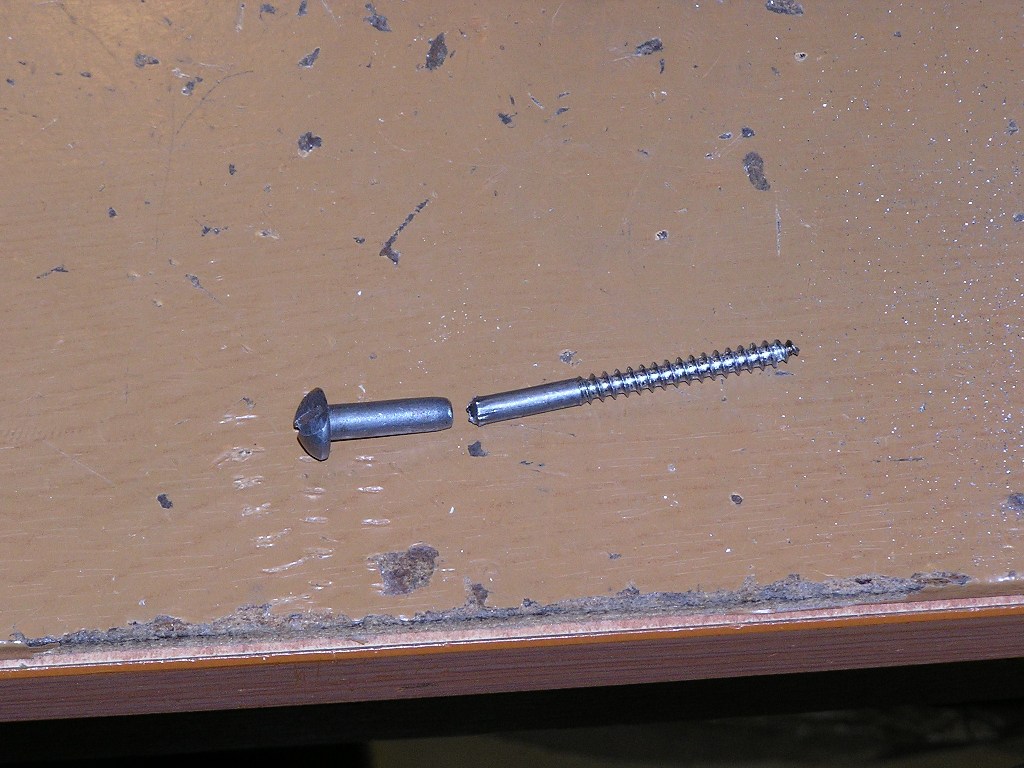
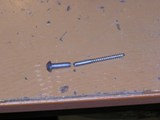
For example, in such way: take a screw, cut a one cm of a neck and sharpen it.
We made the holes in then board, let's make holes in the keys. It is
unposiible to calculate it's positions beforehand, so we need to mark it.
For example, in such way: take a screw, cut a one cm of a neck and sharpen it.
 Take a key and put it on it's place and press. We obtained a mark for a hole.
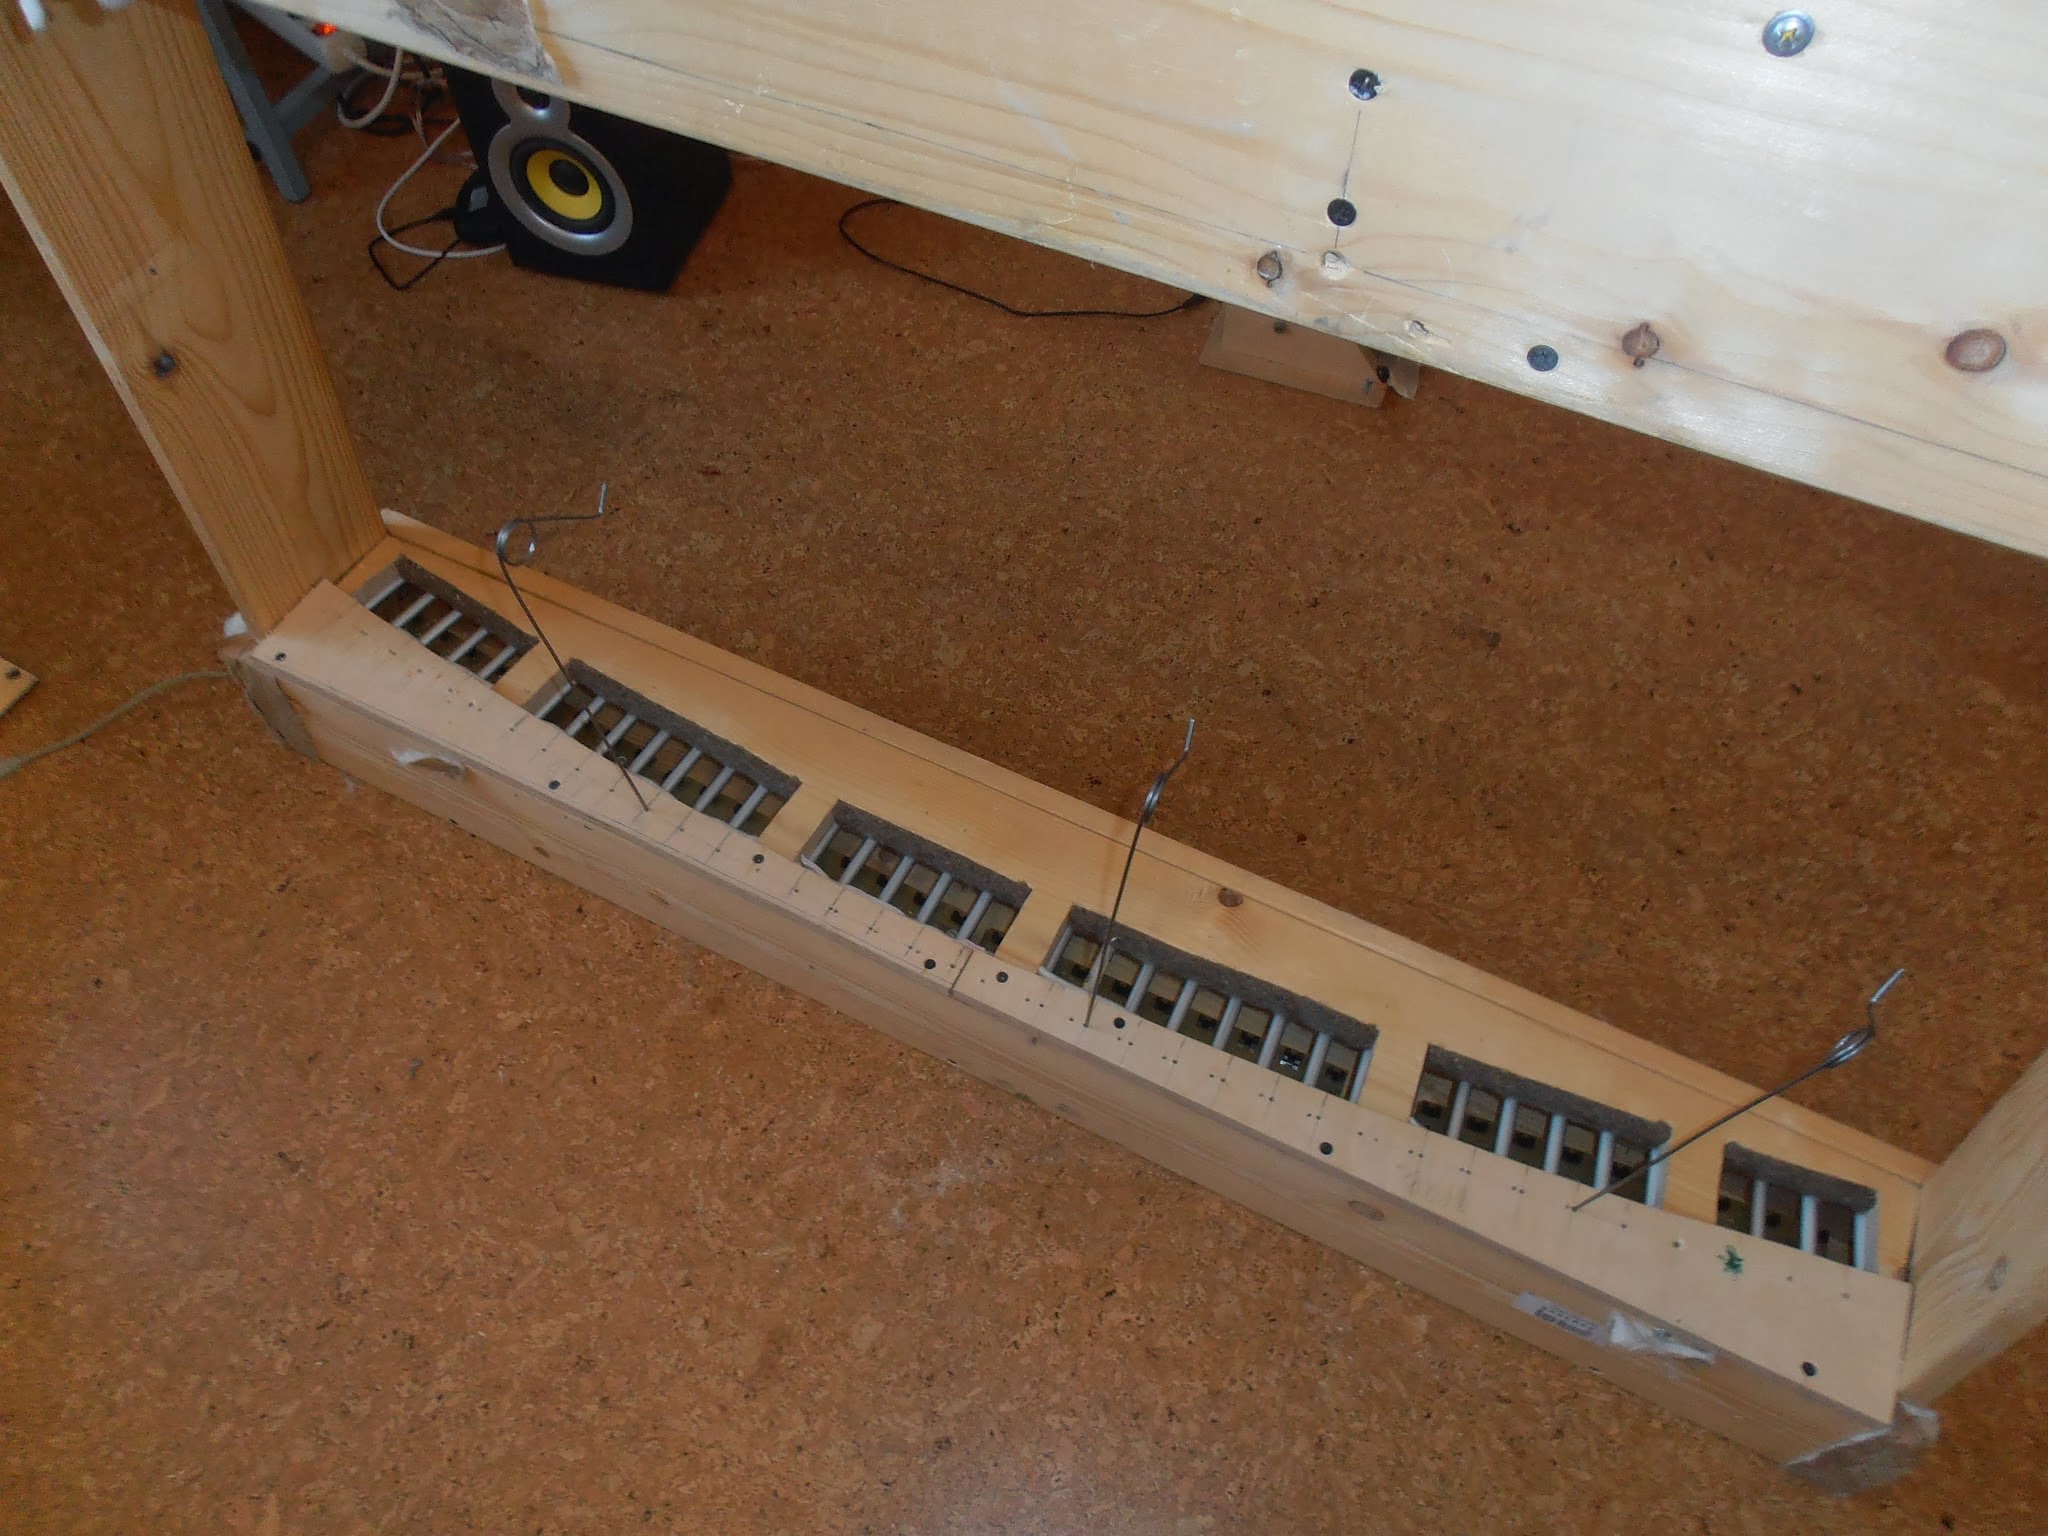
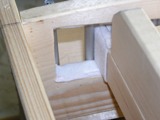
After that cut an arc on 20mm to make a place for the springs.
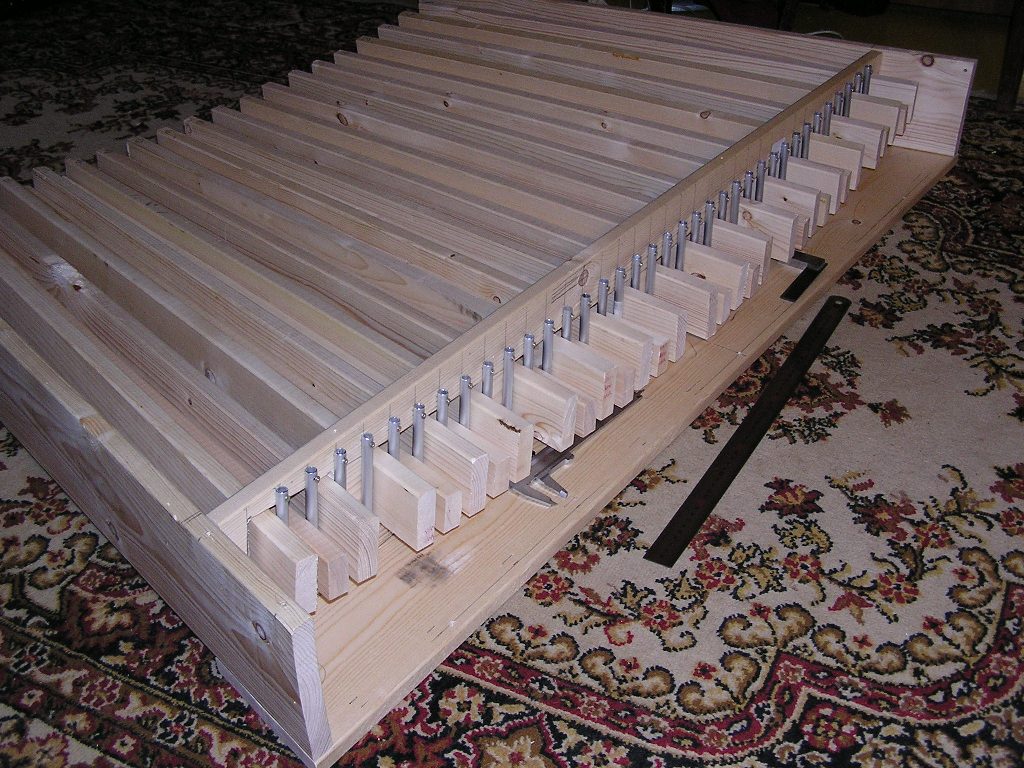
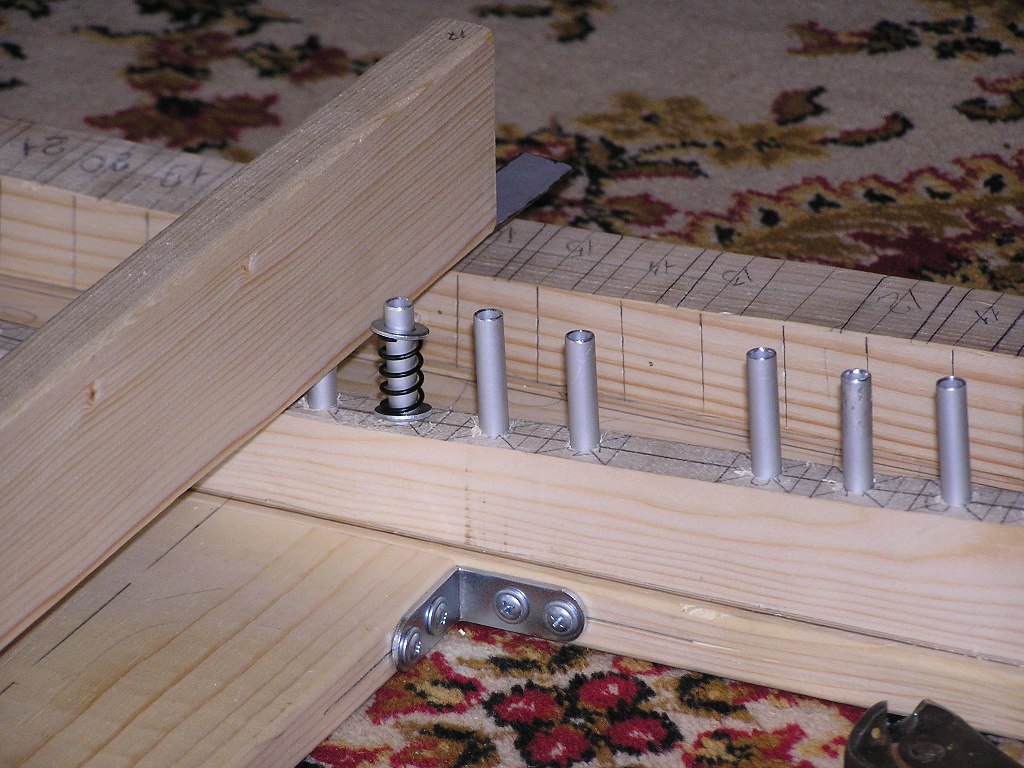
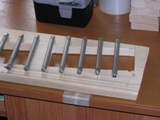
 To make tracks for he springs, I used an aliminium tube 8mm. Cut it on 32 pieces
50-60mm length and put into holes.
To make tracks for he springs, I used an aliminium tube 8mm. Cut it on 32 pieces
50-60mm length and put into holes.
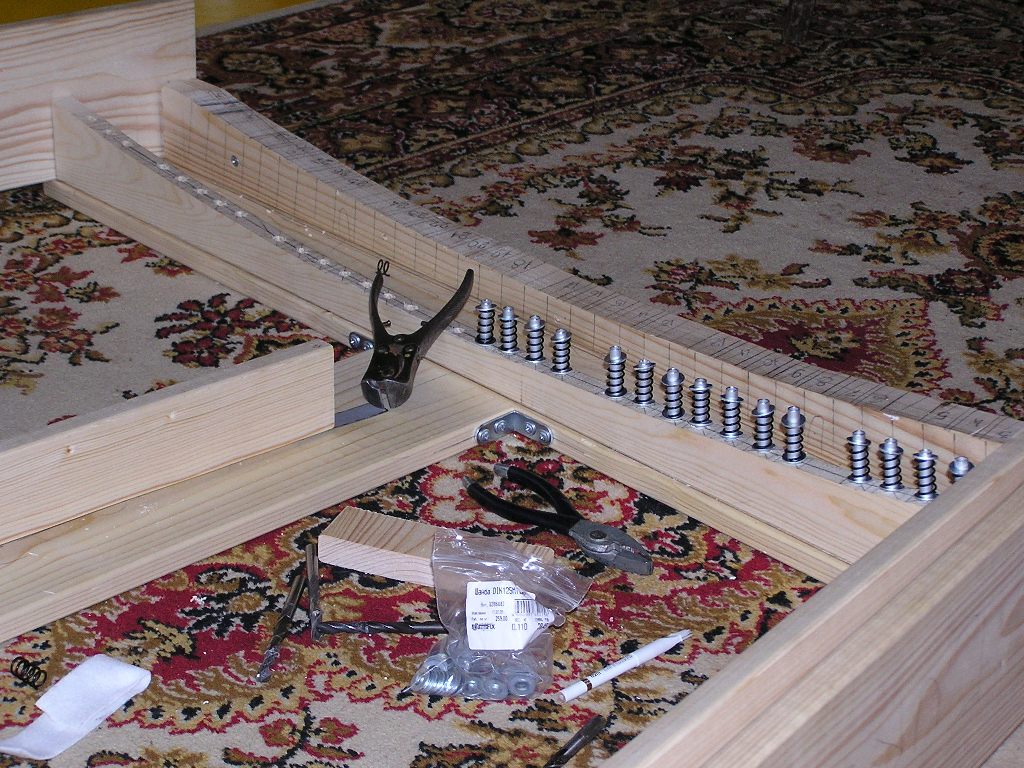
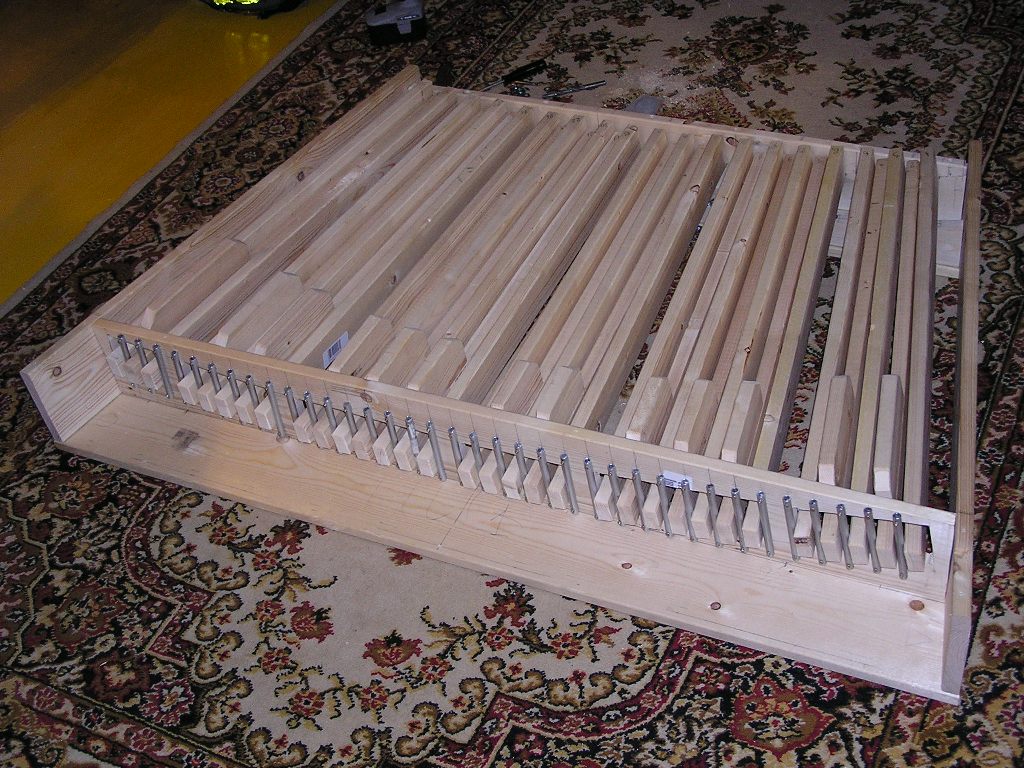
 After that put washers and springs.
Keys-II
 At the points marked by a screw, made the cuts 10mm width and 15mm legth.
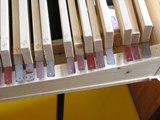
 Now, we make the white key cuts to make it's front height 40mm. Install sharp's
top pieces and mark it's positions at a side, to make it visible when top
pieces are installed.
Now, we make the white key cuts to make it's front height 40mm. Install sharp's
top pieces and mark it's positions at a side, to make it visible when top
pieces are installed.
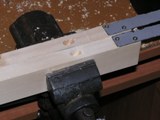
 Let's drill holes for the screws. To make it along a key, we set up a setsquare
and orient the drill by it.
Let's drill holes for the screws. To make it along a key, we set up a setsquare
and orient the drill by it.
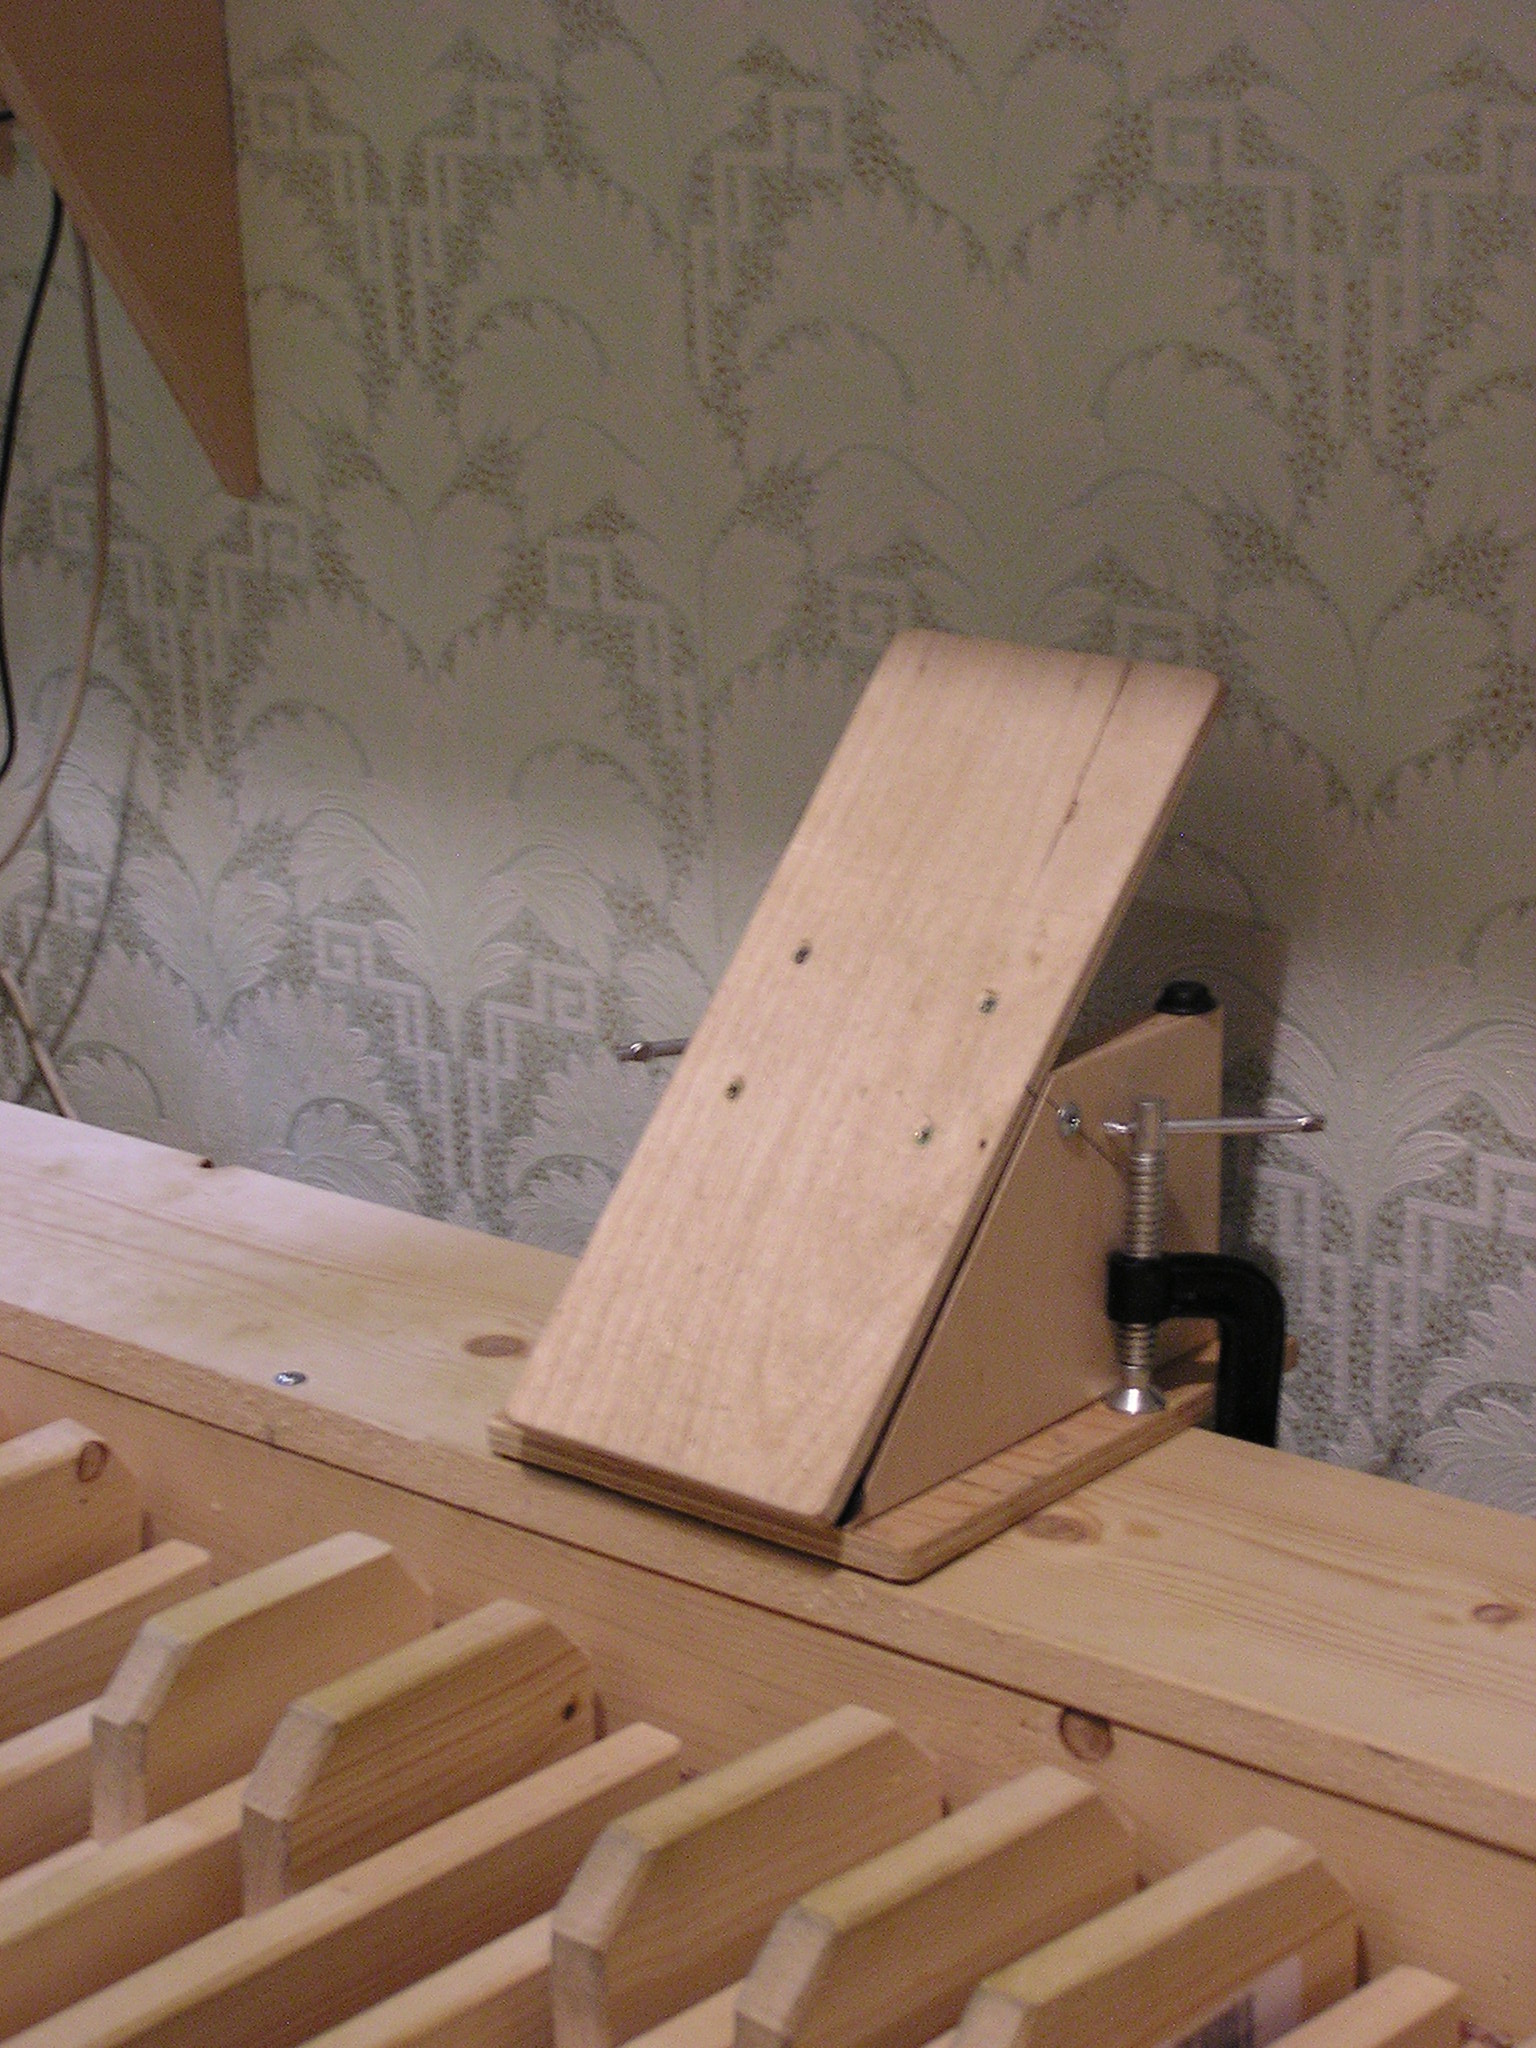
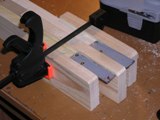
 Attach the sharp top pieces. To make it parallel to the key base, we fix it
between two boards.
Attach the sharp top pieces. To make it parallel to the key base, we fix it
between two boards.
After that we turn this construction over and drive two screws.
 Now we cut the key ends by the marks made previously. Two-three near keys has
the same cut angle, so, it's able to cut it at a one trace, matching line ends.
Now we cut the key ends by the marks made previously. Two-three near keys has
the same cut angle, so, it's able to cut it at a one trace, matching line ends.
 After that we cut the sharps by the lines we marked before. Here is a result.
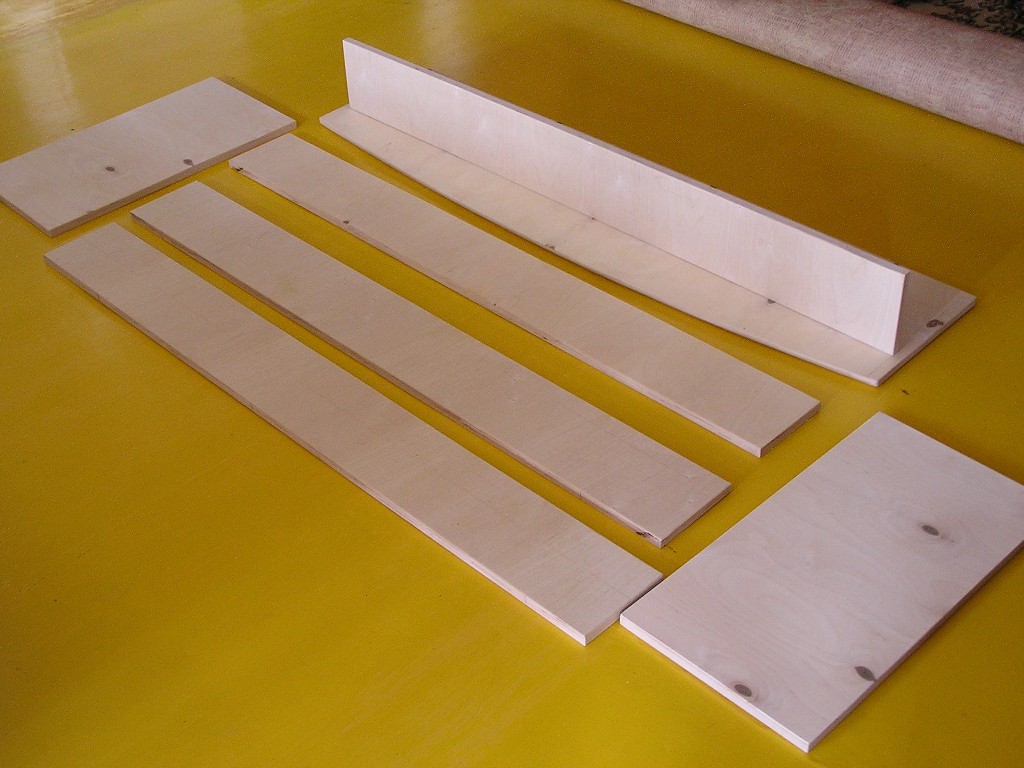
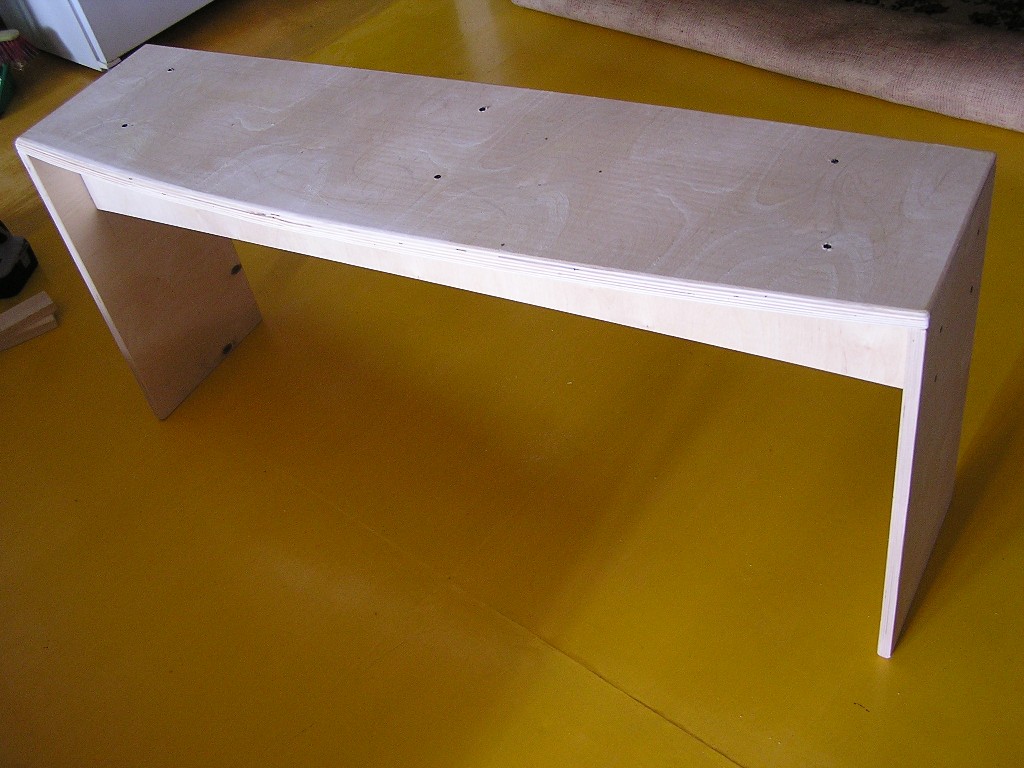
Bench
It would be discourage to make a pedalboard and not to have ability to play it.
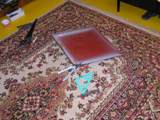
So, let's put pedal of and make the bench. I decided to make it from a paywood
sheet 18mm thickness and 1.5x1.5m size.
 It is very easy to make a bench – just connect by the screws.
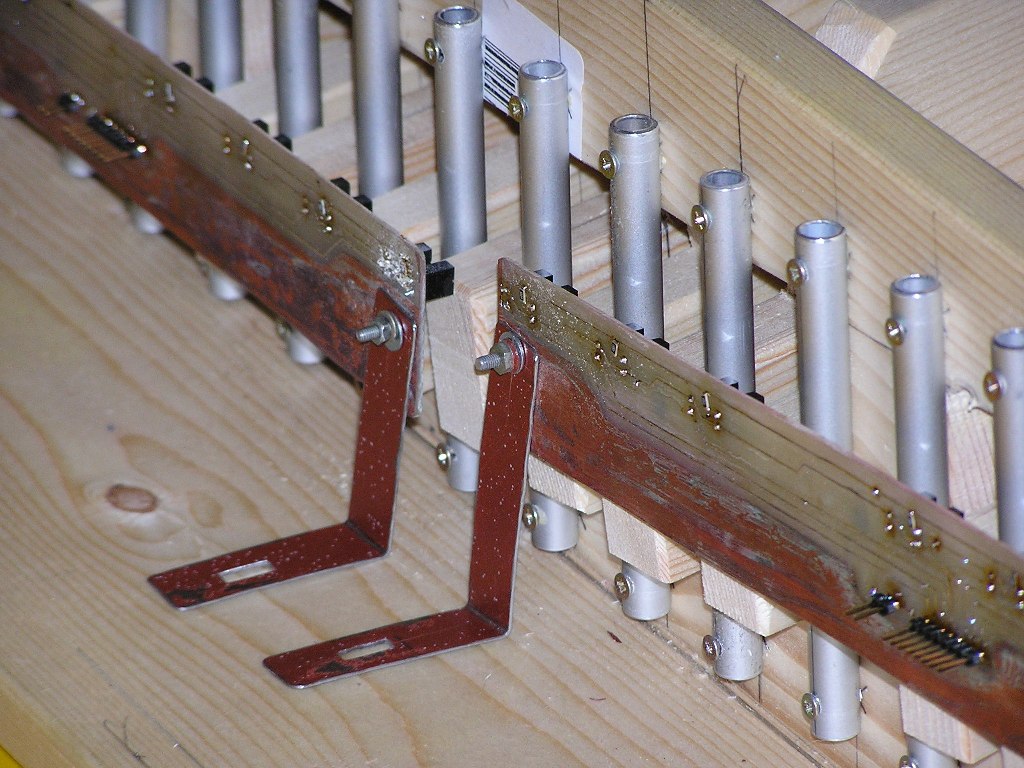
Photointerrupter PCBs

 Let's begin from corners. We made it fromm the same washing machine sides that
the plates at keys rear. Note, that the corners have different height and long
holes at bottom. It will allowo us to change space between interrupters and
keys.
Let's begin from corners. We made it fromm the same washing machine sides that
the plates at keys rear. Note, that the corners have different height and long
holes at bottom. It will allowo us to change space between interrupters and
keys.
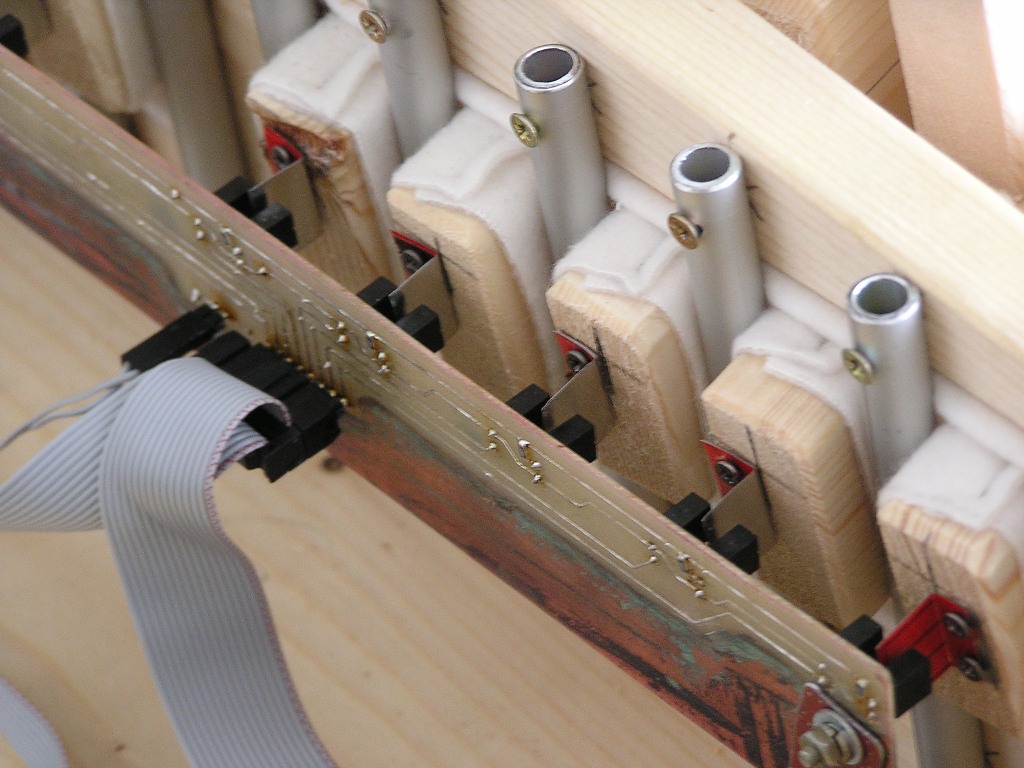
 Next, we prepare PCBs. We made the long holes for adjustment. The top side
position must be choosen so the corner doesn't touch the photointerrupter
contacts.
Next, we prepare PCBs. We made the long holes for adjustment. The top side
position must be choosen so the corner doesn't touch the photointerrupter
contacts.
 Screw and set up.
Keys covering
 To make the pedalboard knockless, let's cover the keys front by a fleece. To
fix it, we can use staples, which can be driven in by a hammer or stapler.
To make the pedalboard knockless, let's cover the keys front by a fleece. To
fix it, we can use staples, which can be driven in by a hammer or stapler.
 Cover the front board inside.
�eys-III
 It's a time to fix the keys finally. We drill 3mm holes at the plates and put
the keys at it's places.
It's a time to fix the keys finally. We drill 3mm holes at the plates and put
the keys at it's places.
 Screw it.
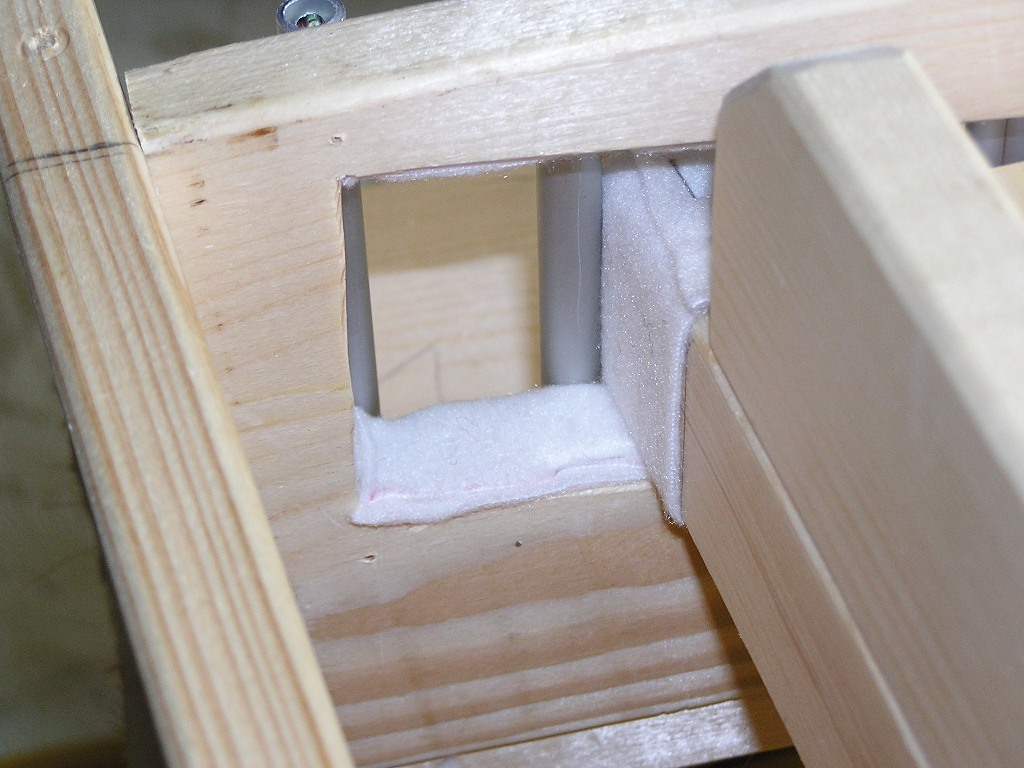
Electronics
 Photointerrupters need shutters. It can be made from anything but not
transparent. I used coffee contaner. Cut it at squares 10x20mm, flex to corner
and screw to key's butt. Vertical position is to be choosen to match the
shutter middle with an optical axis of photointerrupter, when the key is not
held and the PCB is in a middle position. It will allow us to adjust response
moment from the earliest to the latest.
Photointerrupters need shutters. It can be made from anything but not
transparent. I used coffee contaner. Cut it at squares 10x20mm, flex to corner
and screw to key's butt. Vertical position is to be choosen to match the
shutter middle with an optical axis of photointerrupter, when the key is not
held and the PCB is in a middle position. It will allow us to adjust response
moment from the earliest to the latest.
 Cut the shutters to made it's ends at a one line.
 Set up PCBs and wire it.
New springs NEW
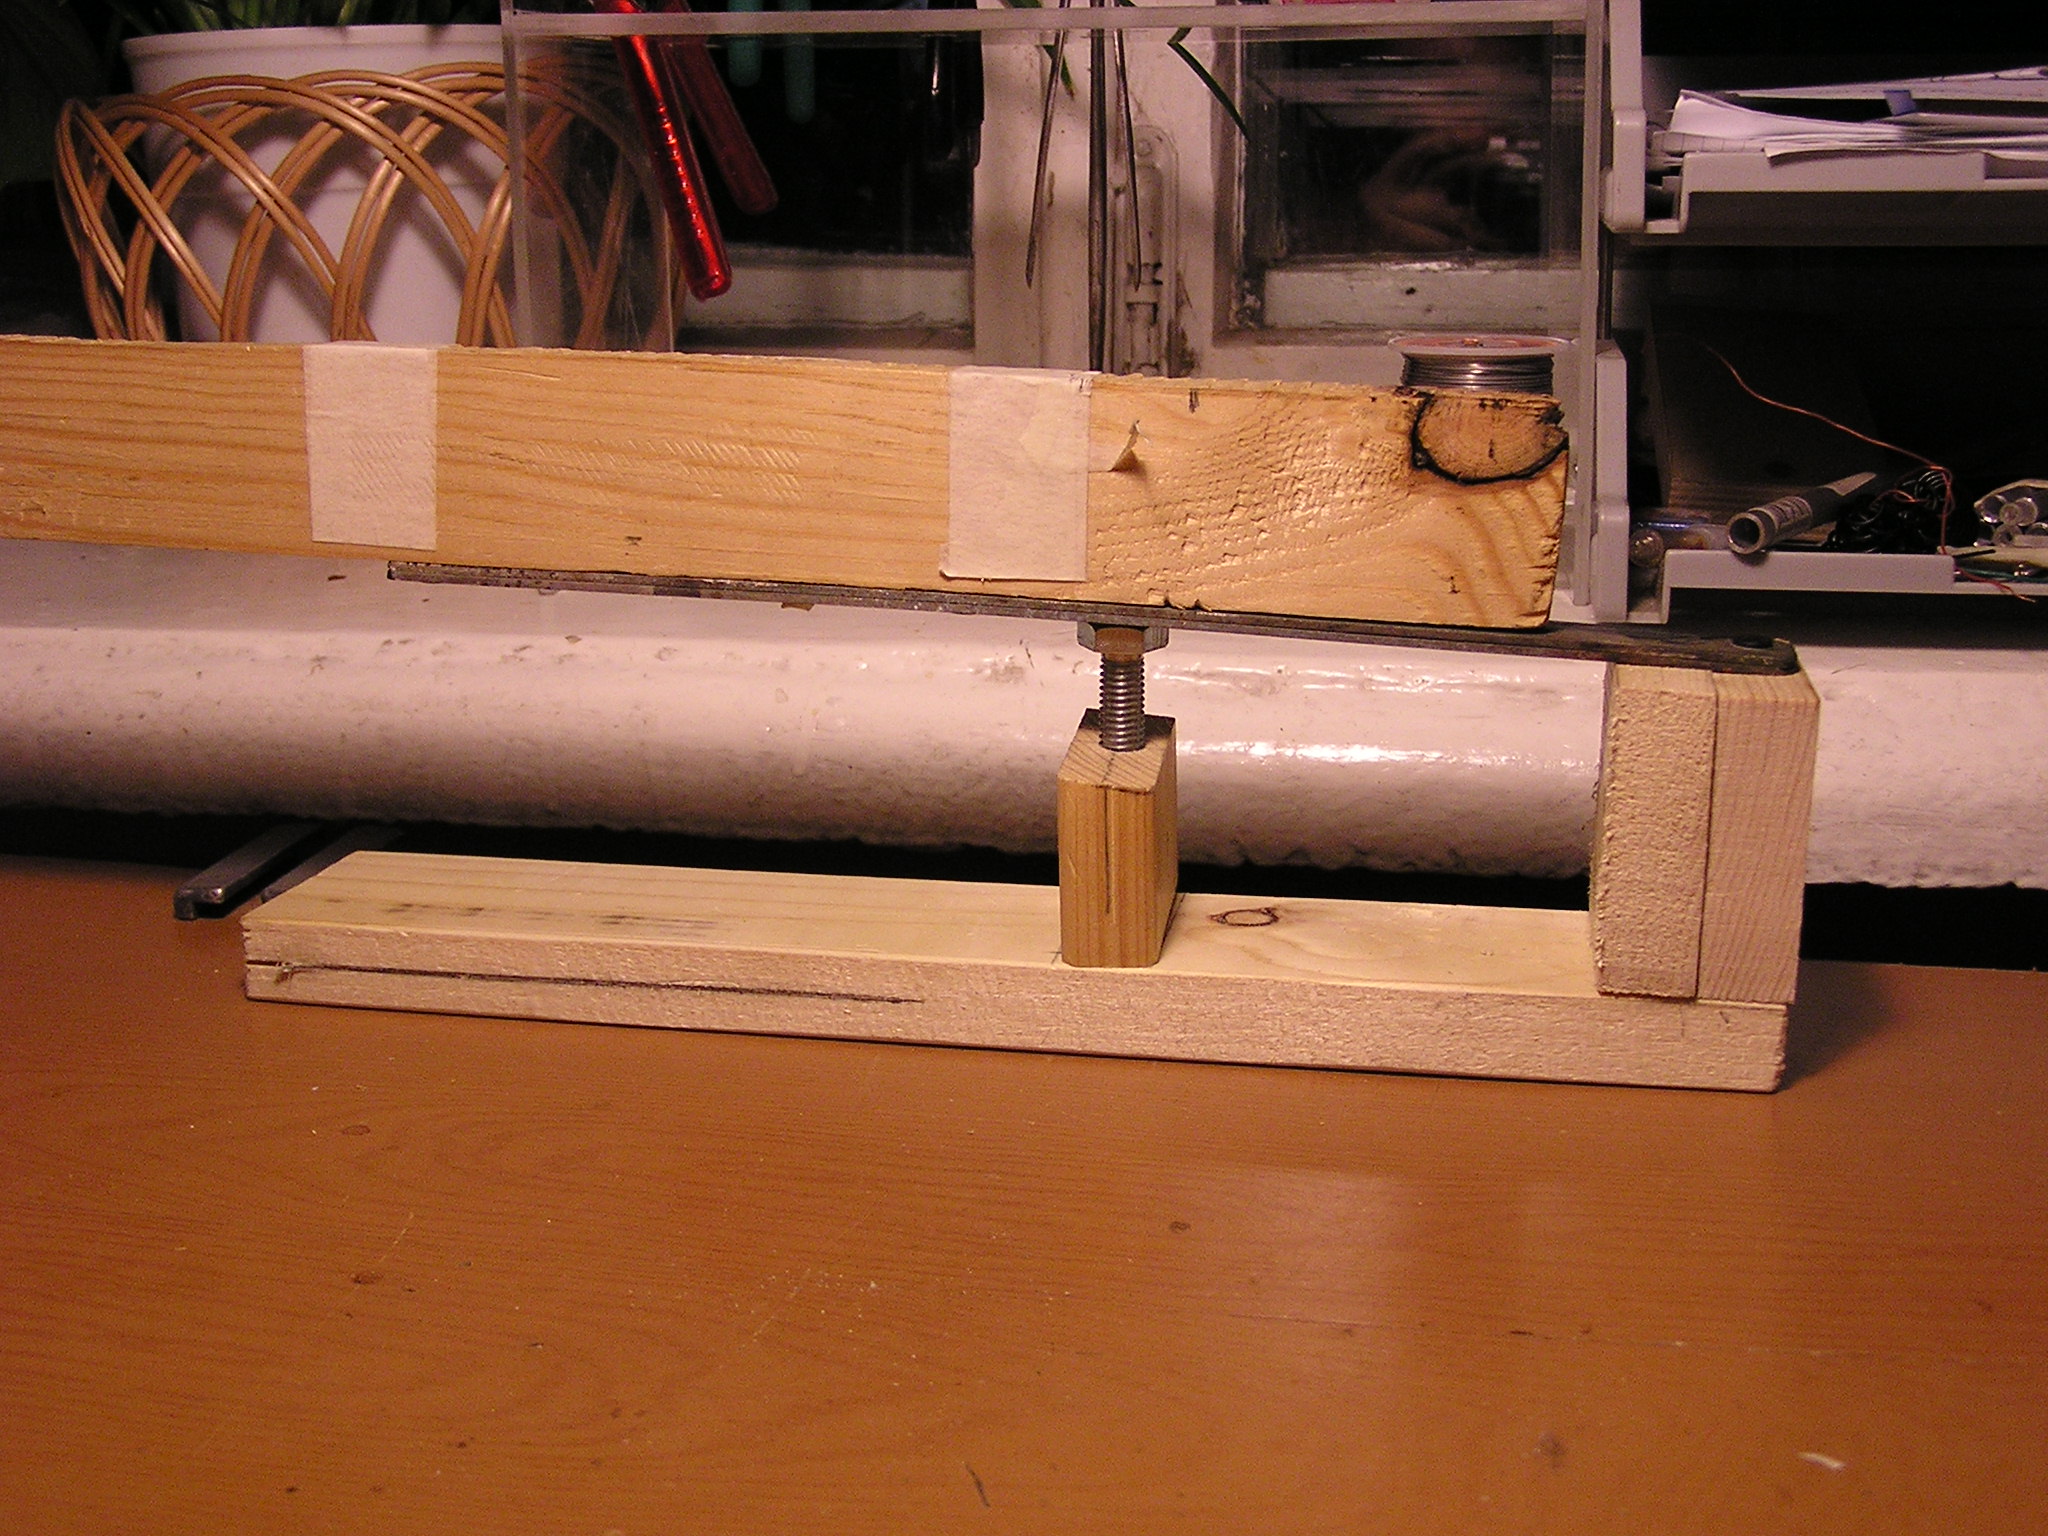
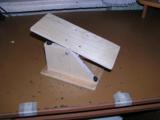
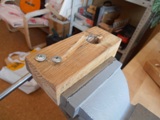
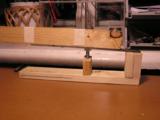 To obtain necessary bend angle, we have made the prototype. The bolt allows
to change the force.
To obtain necessary bend angle, we have made the prototype. The bolt allows
to change the force.
 Now slightly ream the tube holes and place the bolts there.
 Mount the keys at it's place, beforehand slightly unscrew the bolts.
 Here is the result
Crescendo pedal
I decided to play some romantics. For this, the organ must have a expression
pedal. I looked some real organ pedal photos and made this:
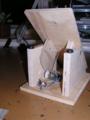
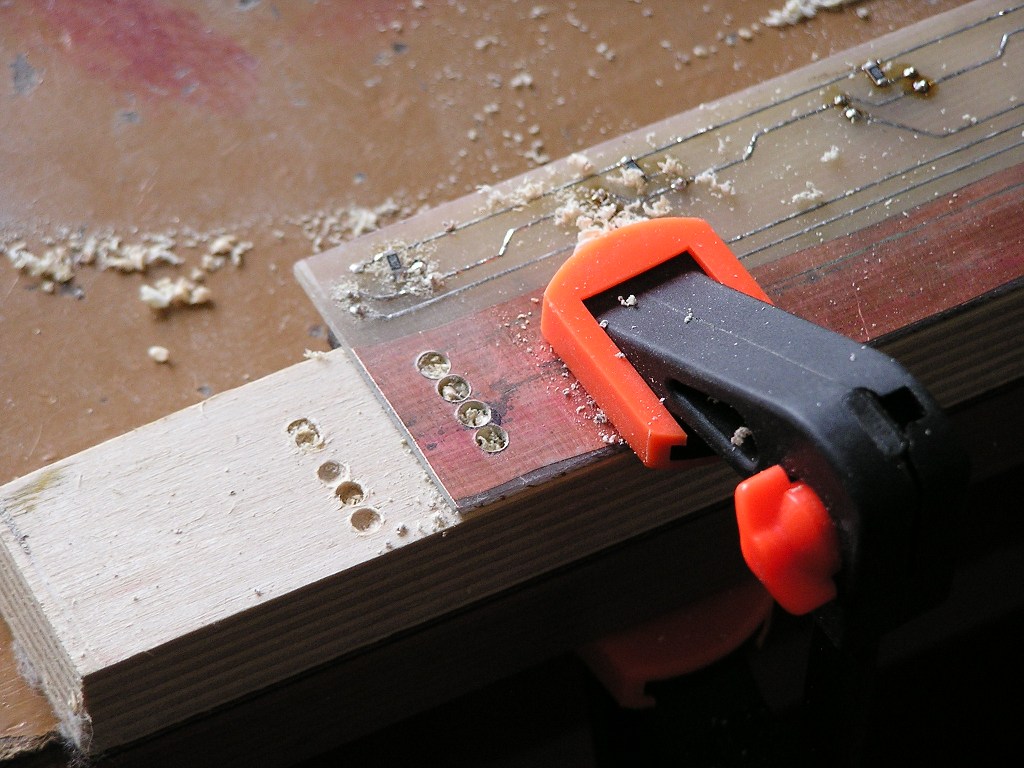
 The ratchet latch was made by my dad from the plexiglass (by hands!). The gear
was taken from an old printer. The resistor is 10k, the jack – 6mm Stereo.
The ratchet latch was made by my dad from the plexiglass (by hands!). The gear
was taken from an old printer. The resistor is 10k, the jack – 6mm Stereo.
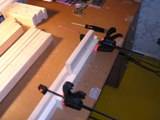
 I temporary fixed the pedal by screw-clamps. I'll made something mo respectable
later.
I temporary fixed the pedal by screw-clamps. I'll made something mo respectable
later.
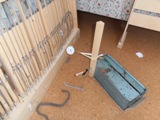
Result
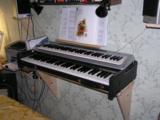
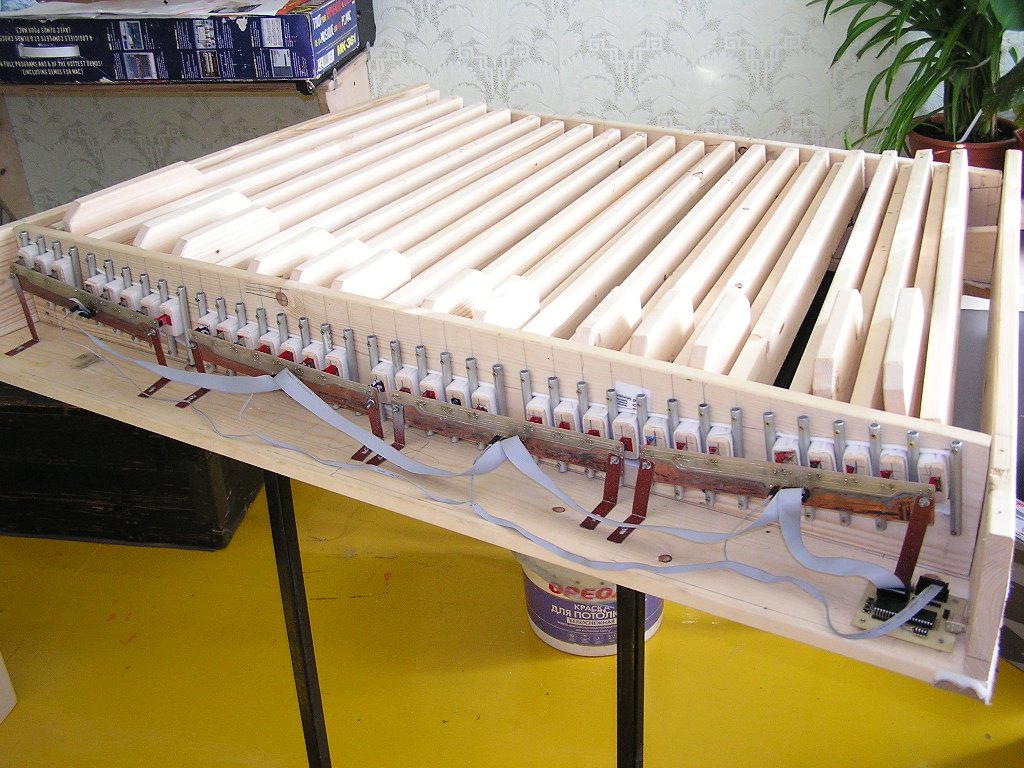
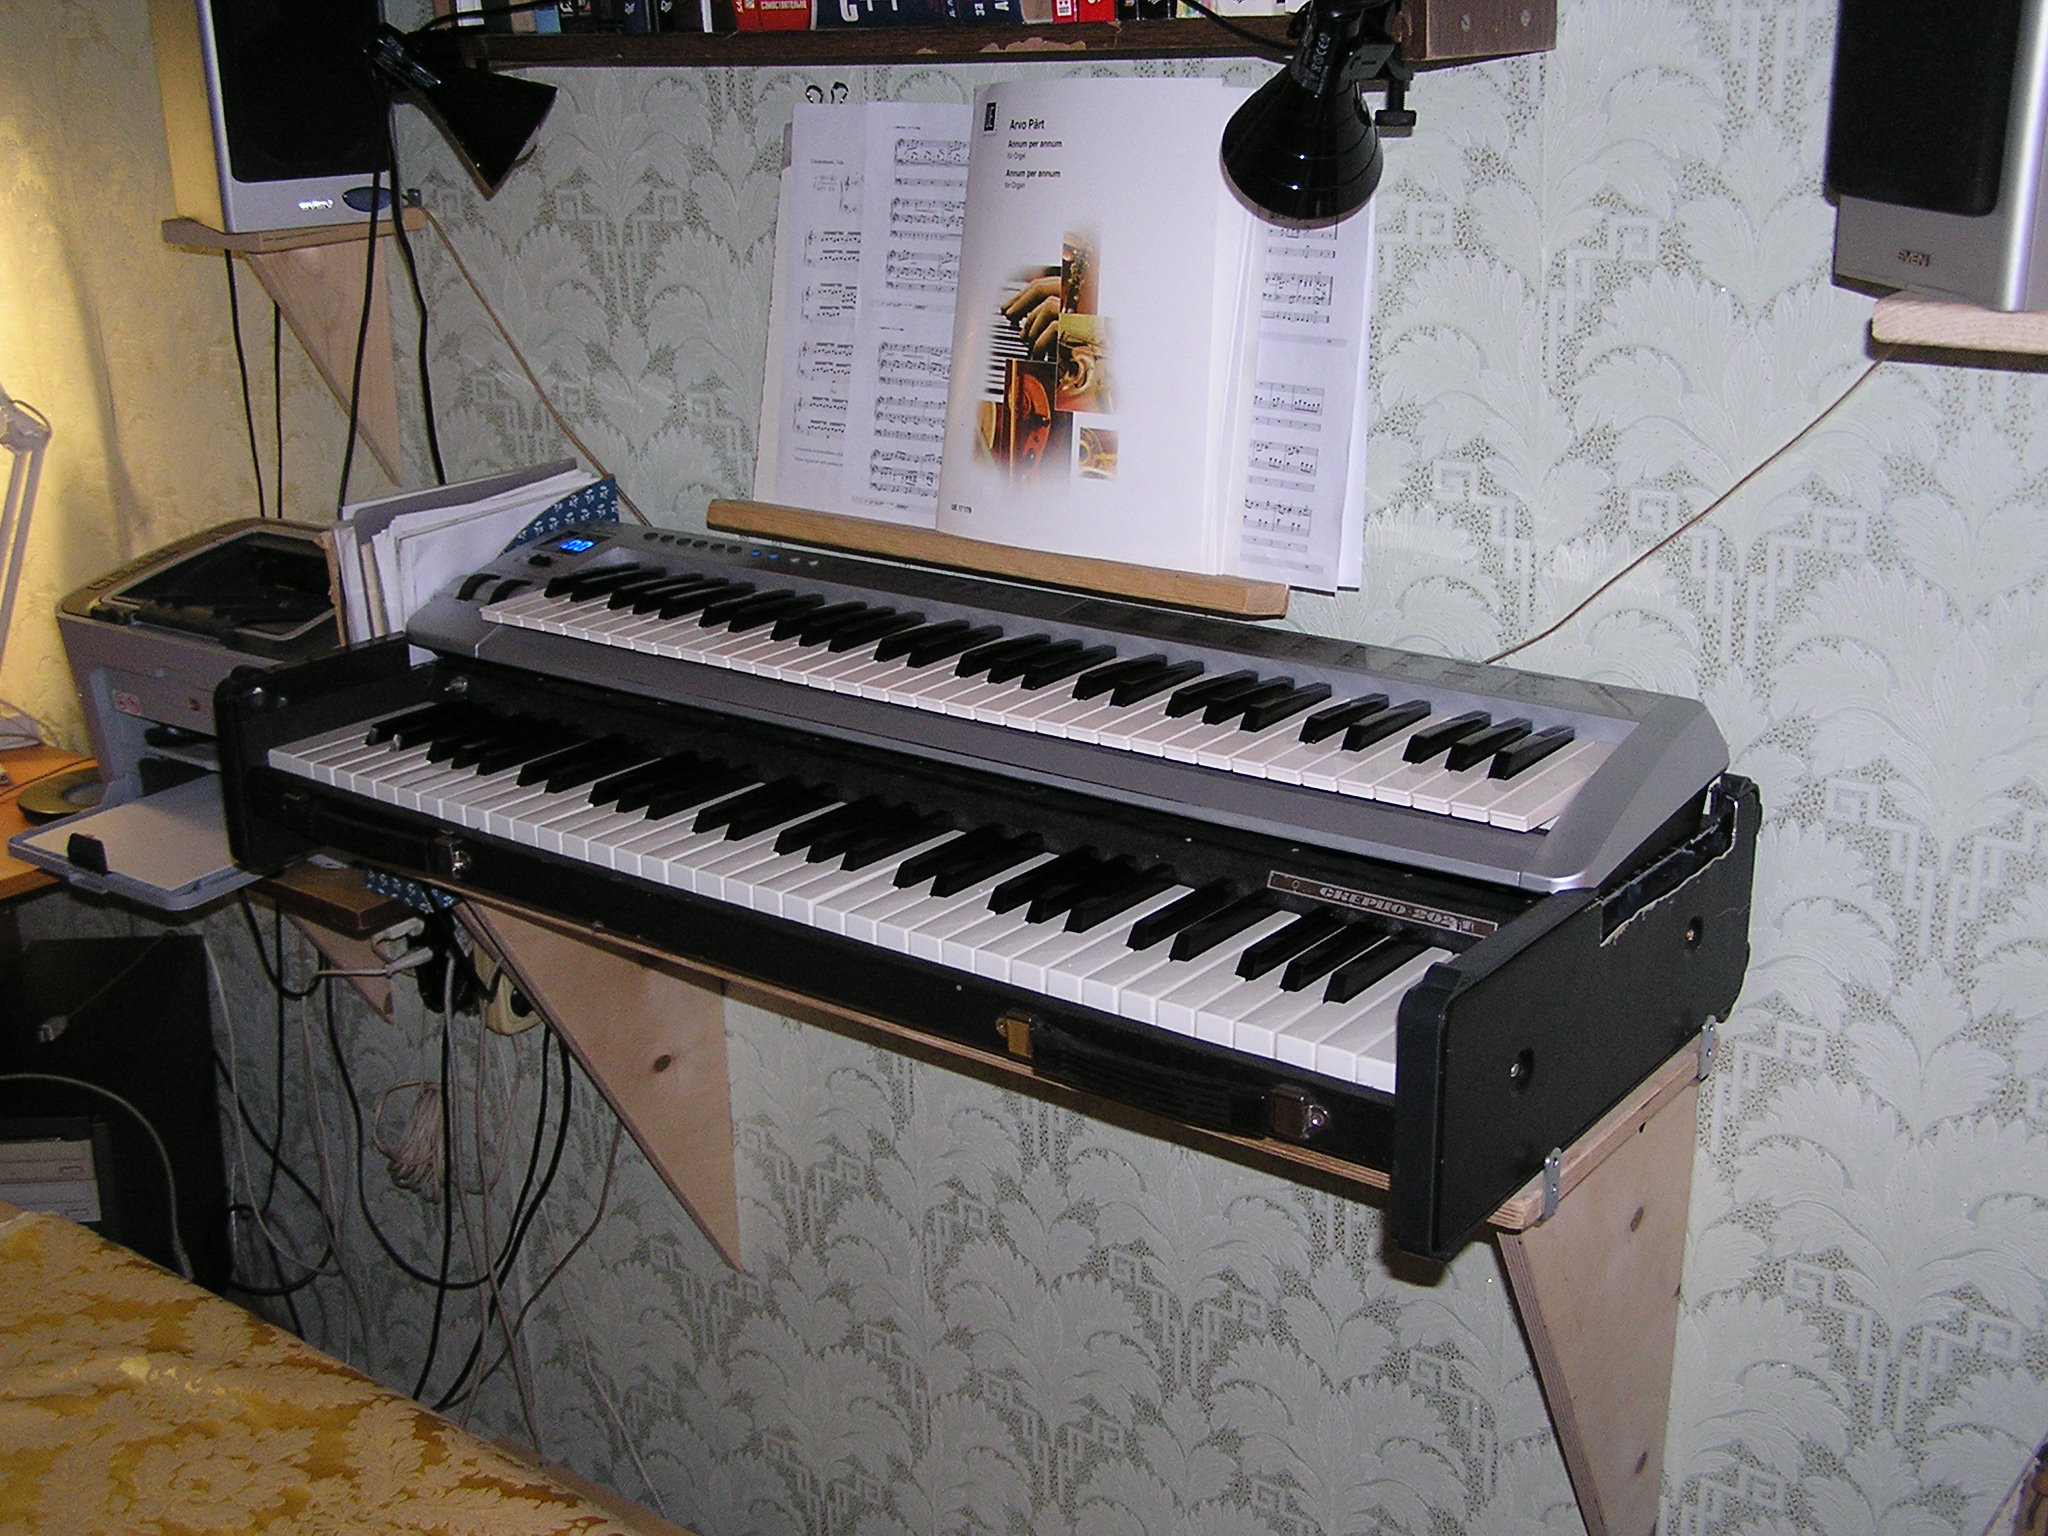
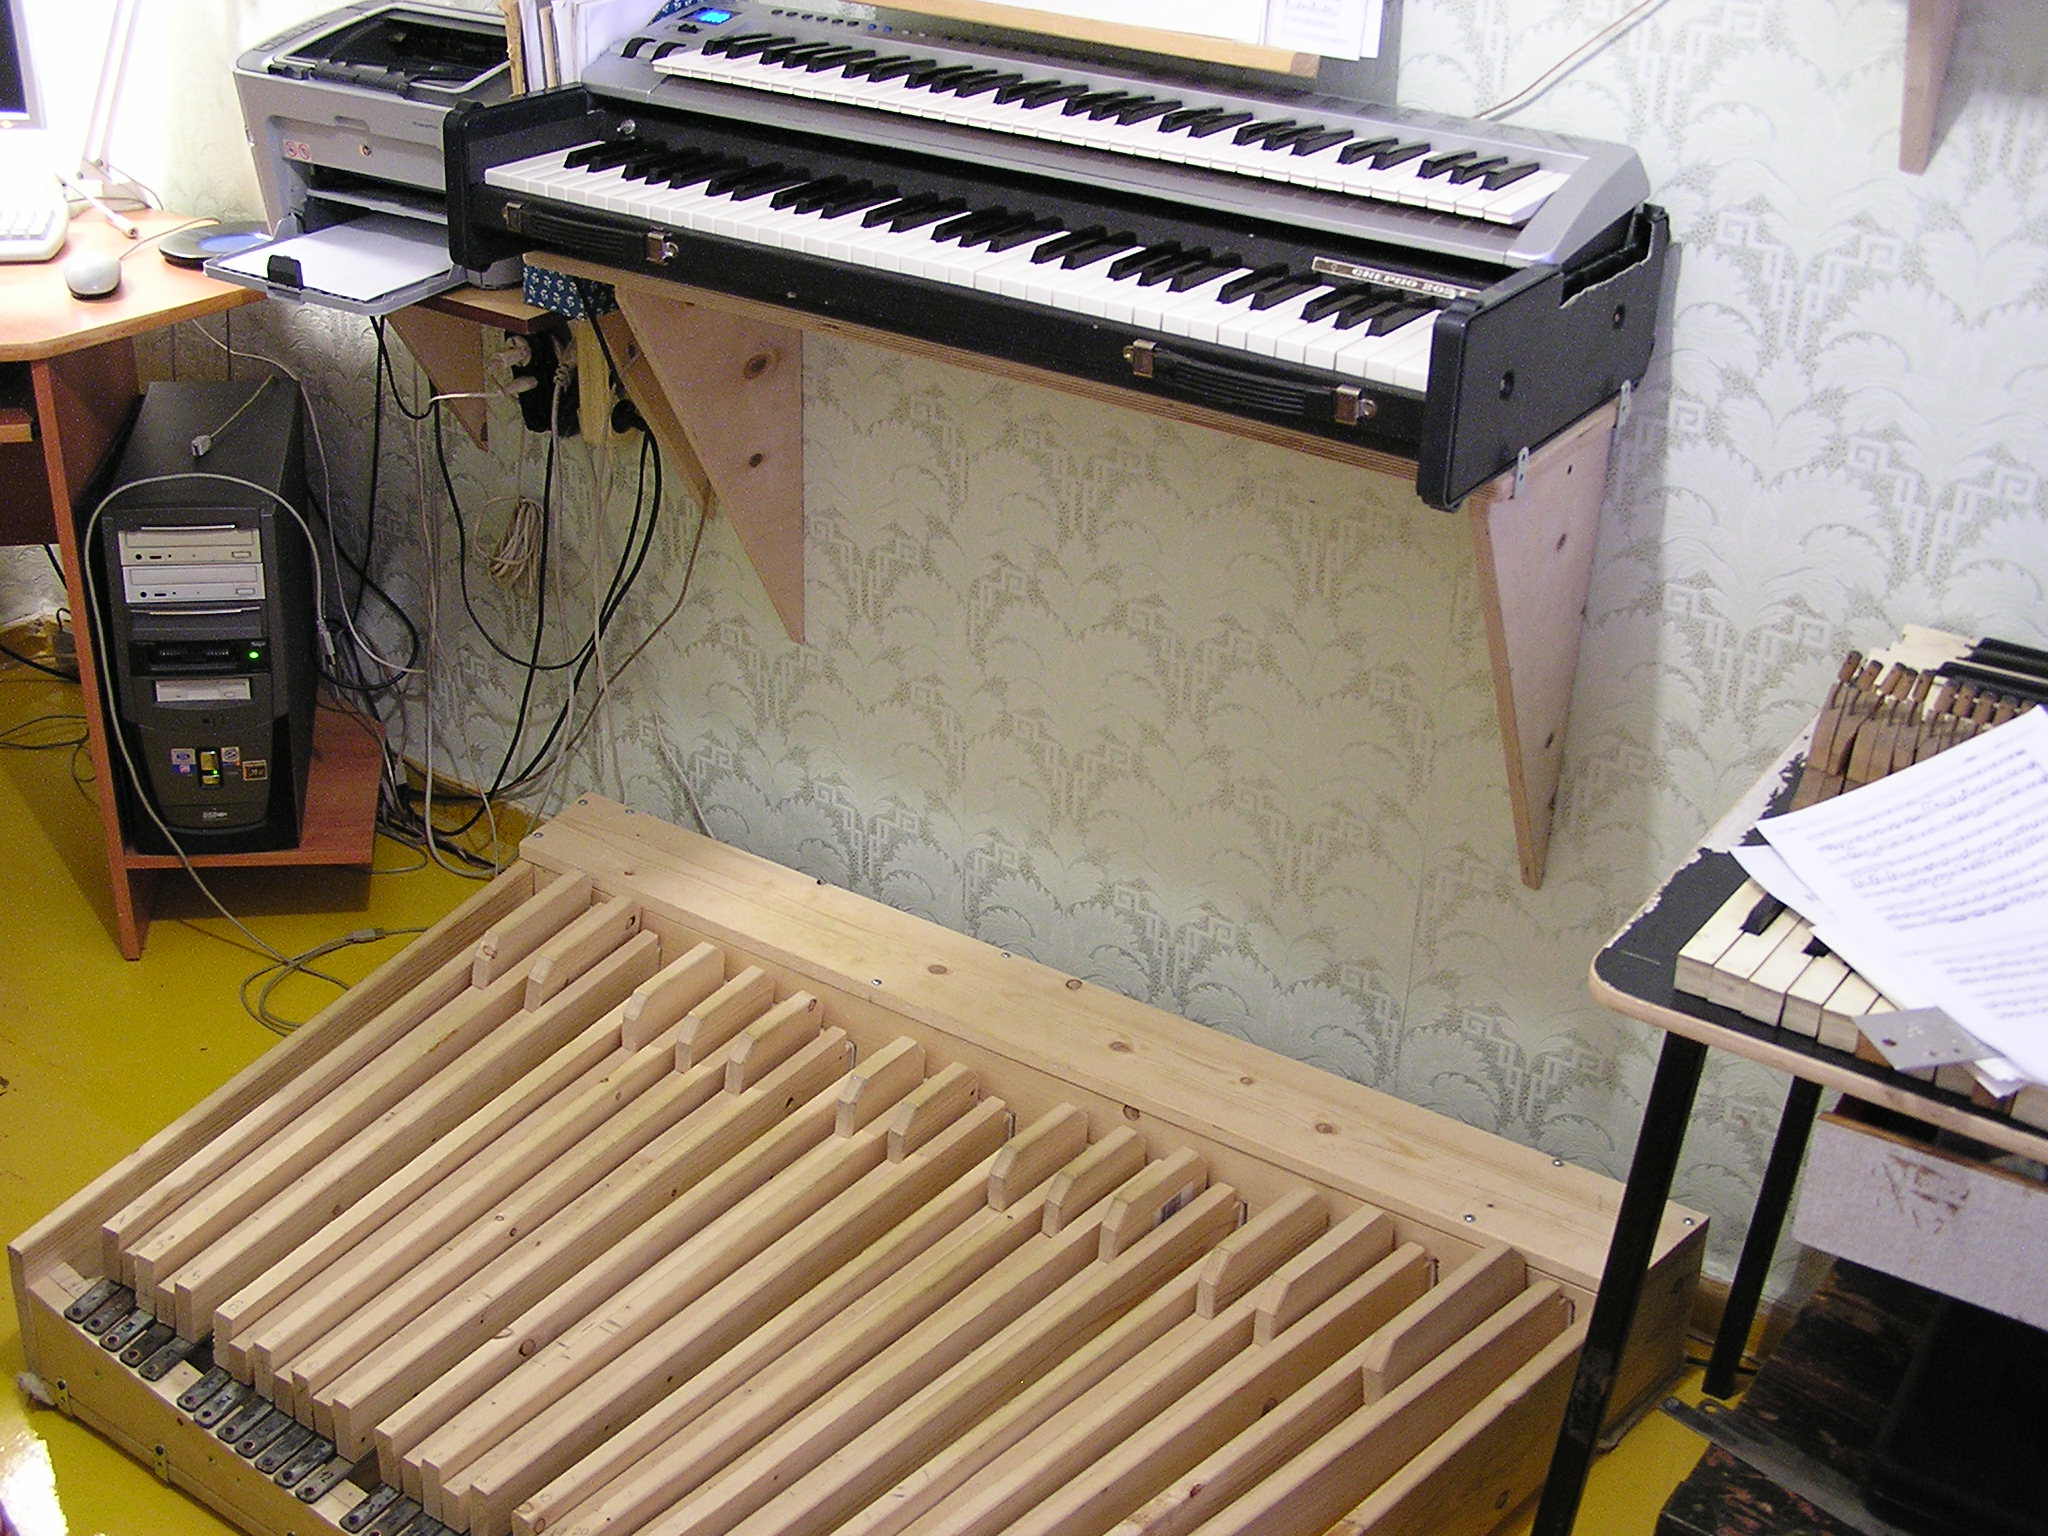
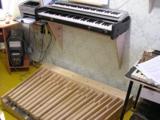 So, it's how does my organ seems now.
New springs. Again...NEW
Finaly I decided to make and install V-shape springs. It is standard for
pedalboards. I searched Internet and found I need 2.5mm musical wire. I could
not found it in my city, so I ordered it by Internet.
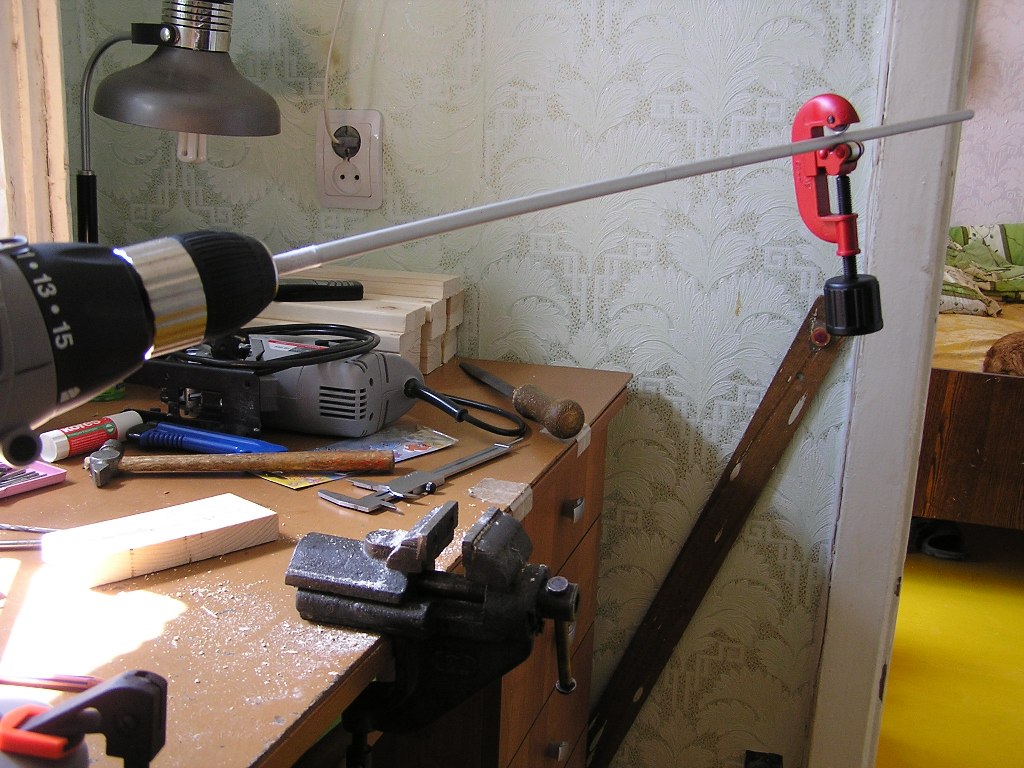
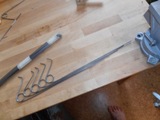
 It's hard to coil a spring wire, so we need a special tool. Fortunately,
Raphi Giangiulio found a
solution.
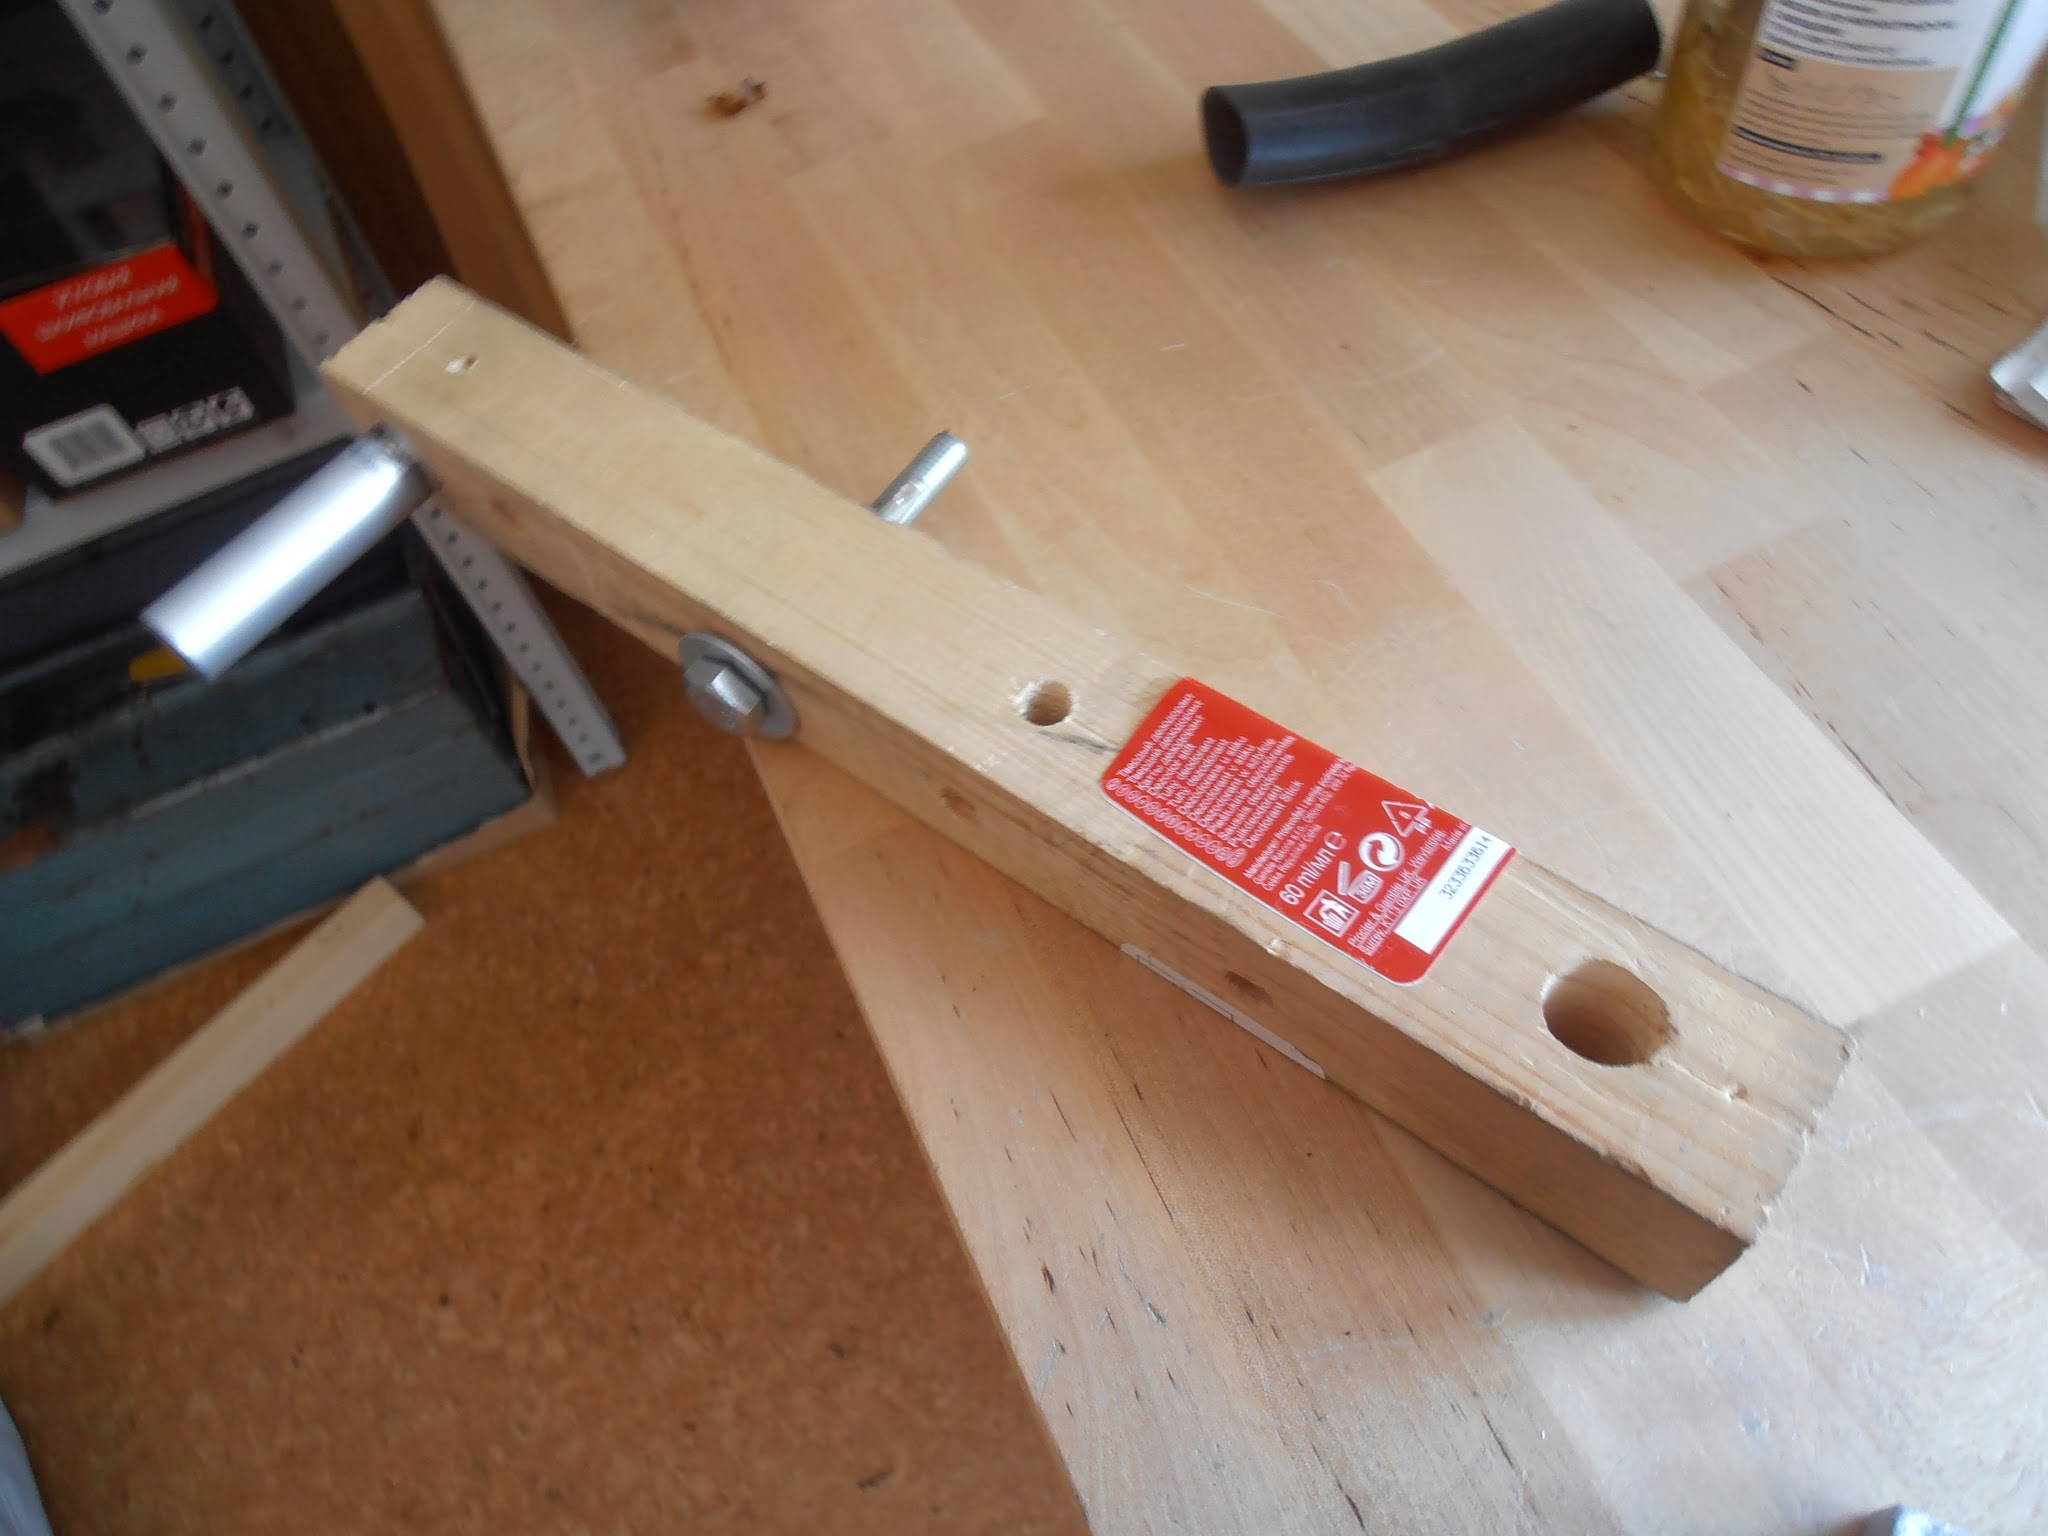
The only disadventage is a high fixing bolt. When rotating a tool it will rest
to the wire. It will be need to slide bars apart. It is inconvient. Possible
solution is to use shorter bar and two screws. This bar also have a riffle
allowing even closer bar sliding.
It's hard to coil a spring wire, so we need a special tool. Fortunately,
Raphi Giangiulio found a
solution.
The only disadventage is a high fixing bolt. When rotating a tool it will rest
to the wire. It will be need to slide bars apart. It is inconvient. Possible
solution is to use shorter bar and two screws. This bar also have a riffle
allowing even closer bar sliding.
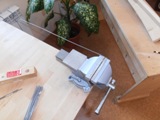
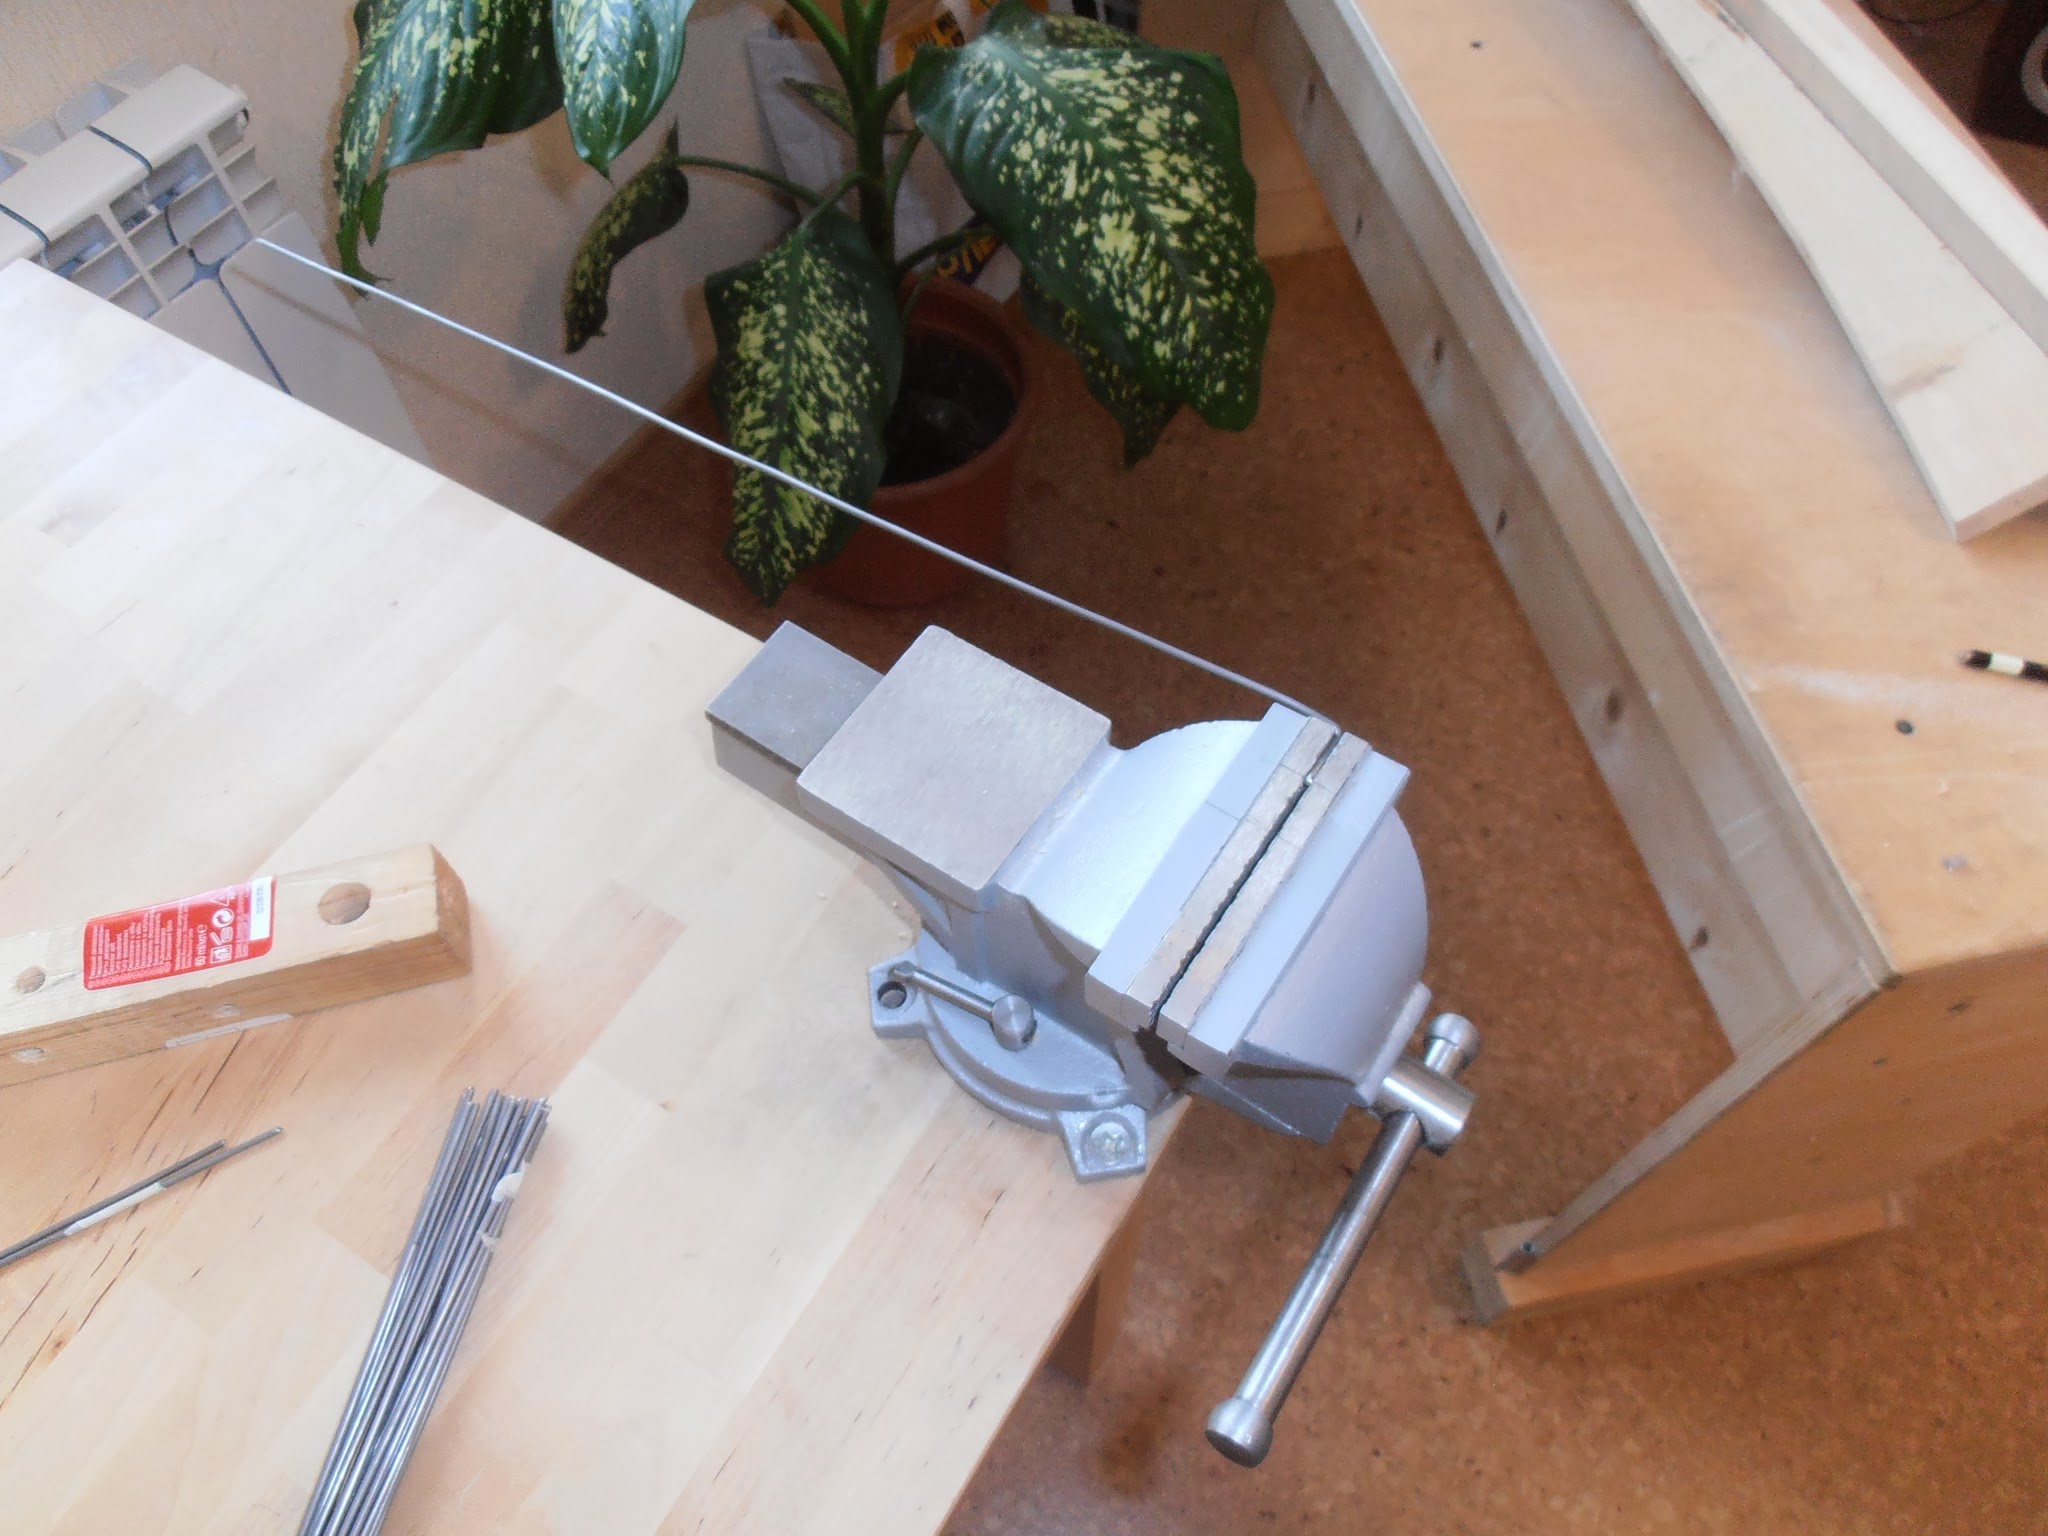
 The spring need a bent end to fix it in a coiling tool. This can be done by
hands in a vice.
The spring need a bent end to fix it in a coiling tool. This can be done by
hands in a vice.
 Now we can coil a spring. Place a bent end between the screws, put a long bar's
tube to the hole, and fix a spring's long end with a bolt. Turn the long bar
about 1.6 turns. We have a spring!
Now we can coil a spring. Place a bent end between the screws, put a long bar's
tube to the hole, and fix a spring's long end with a bolt. Turn the long bar
about 1.6 turns. We have a spring!
 After new springs installed, keys will strike on a front board, so we need a
new 1cm thick felt. It can be simply glued.
After new springs installed, keys will strike on a front board, so we need a
new 1cm thick felt. It can be simply glued.
 Now let's install an additional plywood board. It made the whole construction
more strong. It also make a fixed part of the spring longer.
Now let's install an additional plywood board. It made the whole construction
more strong. It also make a fixed part of the spring longer.
 Old springs and bolts can be used for key force adjustment. But now these
springs are loaded much less. If you release a key too sharply, the back part
will jump and you hear BAMM. Felt is the solution here too.
Old springs and bolts can be used for key force adjustment. But now these
springs are loaded much less. If you release a key too sharply, the back part
will jump and you hear BAMM. Felt is the solution here too.
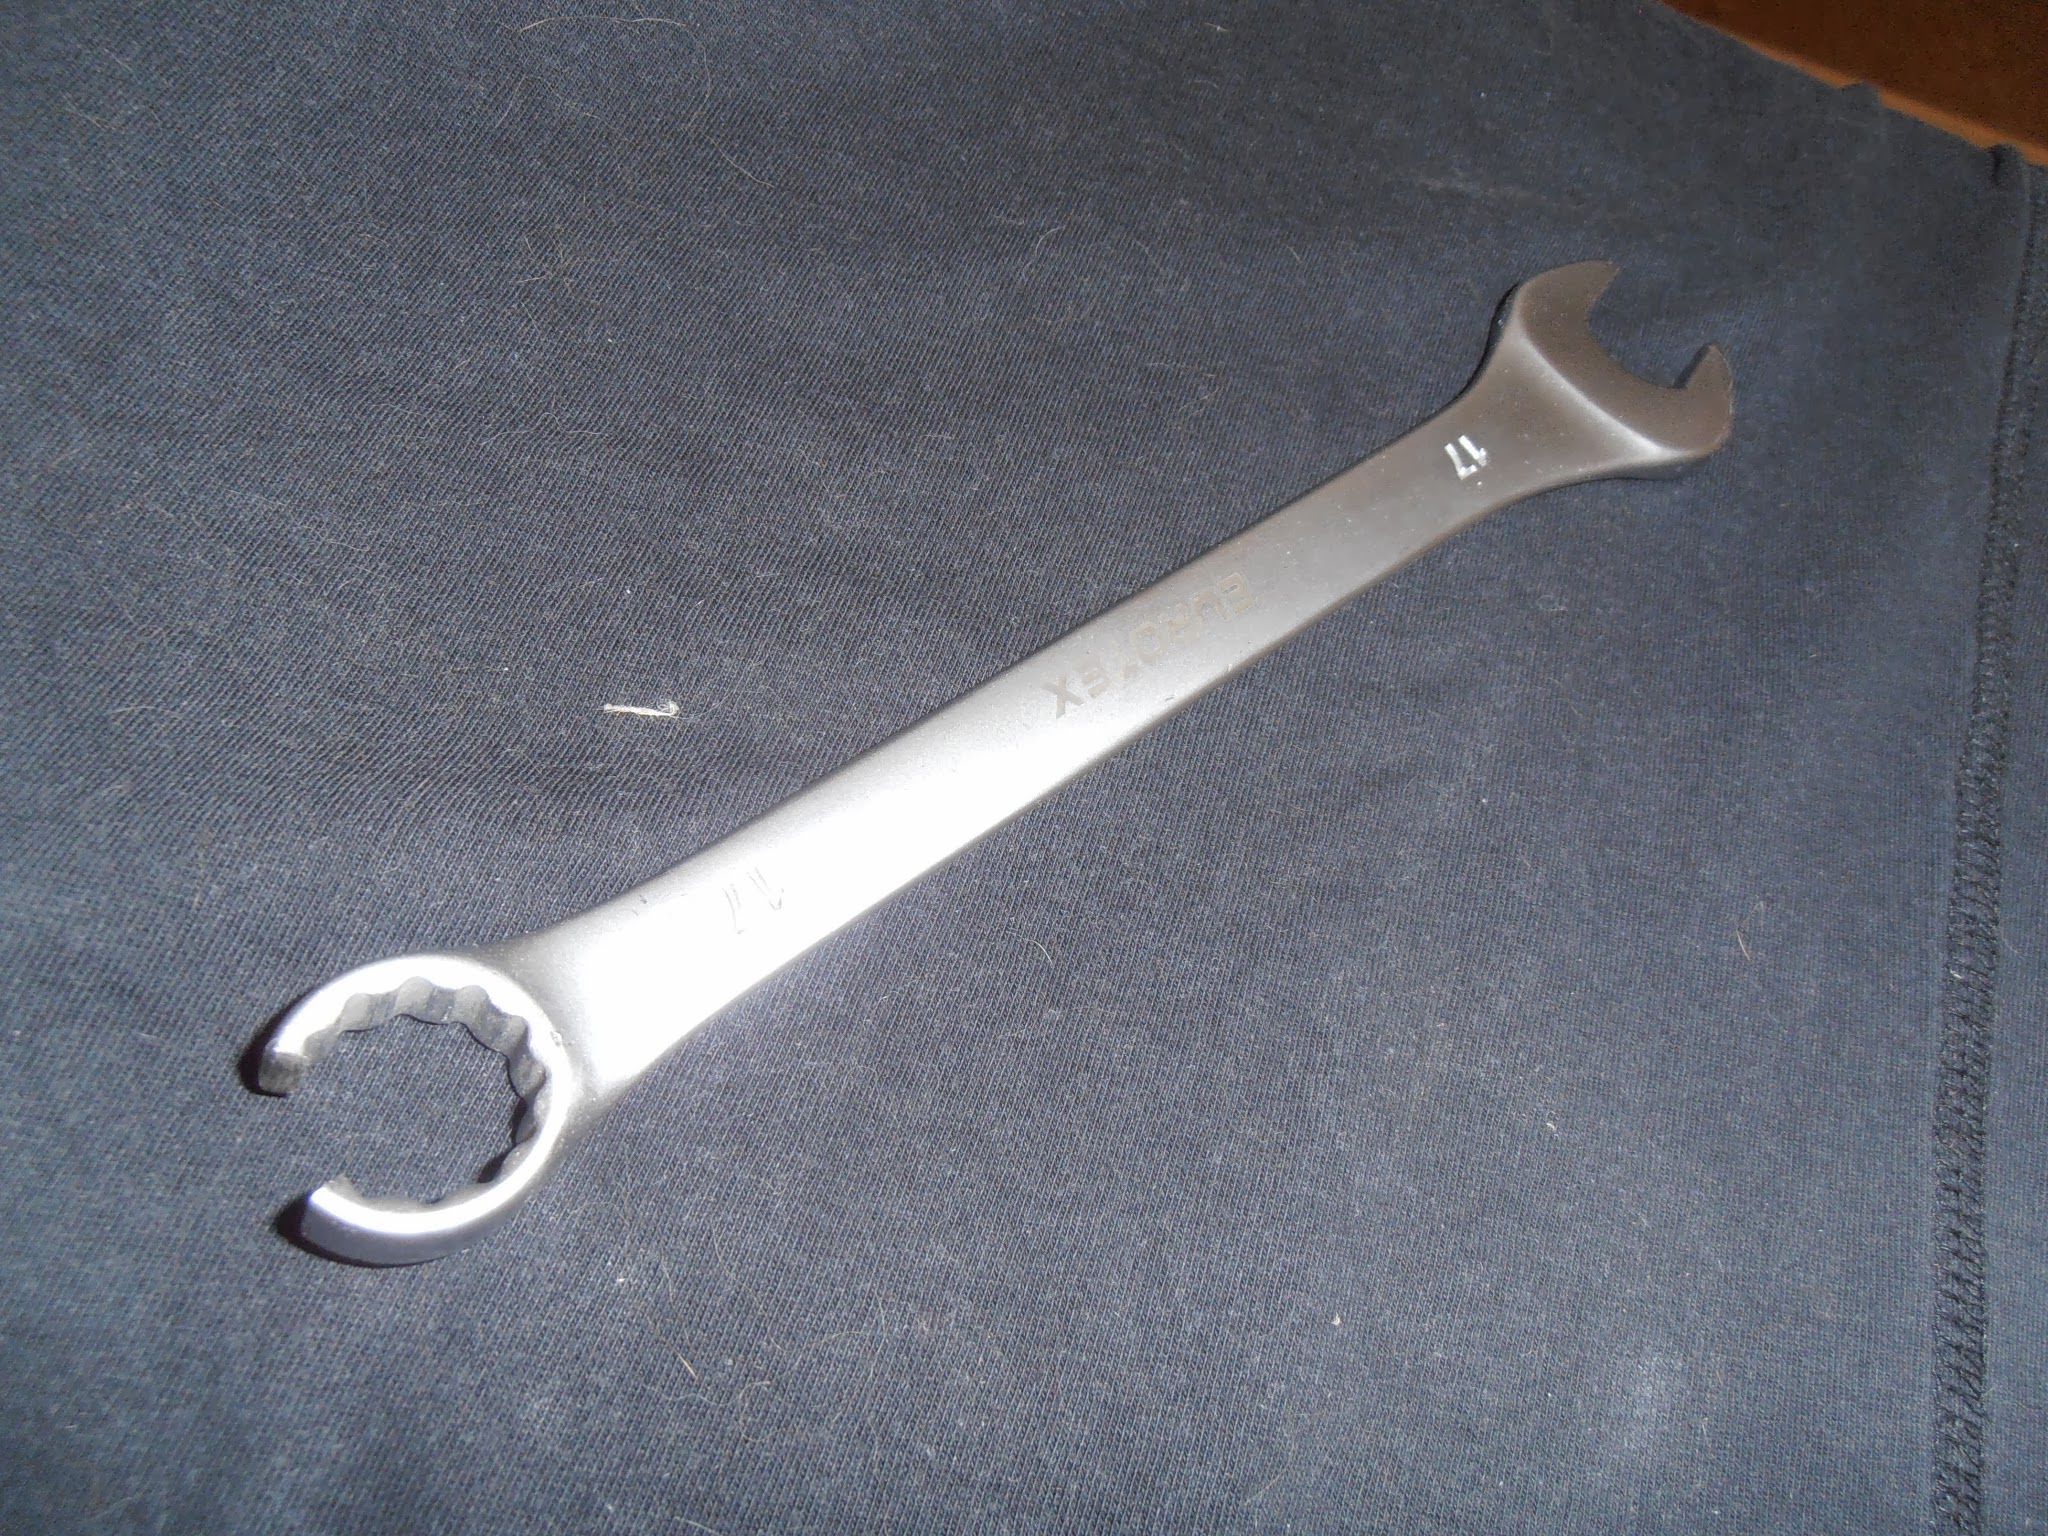
 Bolts are very close to each other, so it is inconvient to use an open-end
wrench. So we need a line (or tube, or flare-nut) wrench. The slit allows to
throw a wrench through a bolt's body. I have not sound such wrench in a shop,
so the slit was made by aa angle grinder.
Bolts are very close to each other, so it is inconvient to use an open-end
wrench. So we need a line (or tube, or flare-nut) wrench. The slit allows to
throw a wrench through a bolt's body. I have not sound such wrench in a shop,
so the slit was made by aa angle grinder.
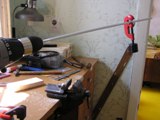
 Now let's solve a poser. How can we measure a key force on a vertical standing
pedalboard? We also need a free hands for wrench manipulations. ...Bingo! We
made a wire hook and tie it to the key and to the scales. The scales are
attached to the wooden bar, and this bar — to the instrument box. We
move the box to achieve semi-pressed key position and turn a bolt to get a force
equal to 1.5kg. It is important to hook a key in a right place. The sharp keys
should be hooked on a middle of the sharp piece, and the white keys over a line
through sharp's butt-end.
Now let's solve a poser. How can we measure a key force on a vertical standing
pedalboard? We also need a free hands for wrench manipulations. ...Bingo! We
made a wire hook and tie it to the key and to the scales. The scales are
attached to the wooden bar, and this bar — to the instrument box. We
move the box to achieve semi-pressed key position and turn a bolt to get a force
equal to 1.5kg. It is important to hook a key in a right place. The sharp keys
should be hooked on a middle of the sharp piece, and the white keys over a line
through sharp's butt-end.
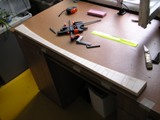
 Also I made a new foot controller stand.
 The tailless. Again...
|


 At the points marked by a screw, made the cuts 10mm width and 15mm legth.
 Let's begin from corners. We made it fromm the same washing machine sides that
the plates at keys rear. Note, that the corners have different height and long
holes at bottom. It will allowo us to change space between interrupters and
keys.
Let's begin from corners. We made it fromm the same washing machine sides that
the plates at keys rear. Note, that the corners have different height and long
holes at bottom. It will allowo us to change space between interrupters and
keys.
 To make the pedalboard knockless, let's cover the keys front by a fleece. To
fix it, we can use staples, which can be driven in by a hammer or stapler.
To make the pedalboard knockless, let's cover the keys front by a fleece. To
fix it, we can use staples, which can be driven in by a hammer or stapler.
 It's a time to fix the keys finally. We drill 3mm holes at the plates and put
the keys at it's places.
It's a time to fix the keys finally. We drill 3mm holes at the plates and put
the keys at it's places.
 Photointerrupters need shutters. It can be made from anything but not
transparent. I used coffee contaner. Cut it at squares 10x20mm, flex to corner
and screw to key's butt. Vertical position is to be choosen to match the
shutter middle with an optical axis of photointerrupter, when the key is not
held and the PCB is in a middle position. It will allow us to adjust response
moment from the earliest to the latest.
Photointerrupters need shutters. It can be made from anything but not
transparent. I used coffee contaner. Cut it at squares 10x20mm, flex to corner
and screw to key's butt. Vertical position is to be choosen to match the
shutter middle with an optical axis of photointerrupter, when the key is not
held and the PCB is in a middle position. It will allow us to adjust response
moment from the earliest to the latest.
 So, it's how does my organ seems now.